Vertex Color Export (Legacy)
How the original 3D Print Export tool converted textures to vertex colors for multi-color 3D printing, and where each feature lives now.
This tool has been replaced. Since October 1, 2026, 3D models are prepared for printing with Export for 3D Printing, which adds a live preview, automatic watertight repair, real-world sizing and support for 1-8 filaments. This page documents the previous version for reference.
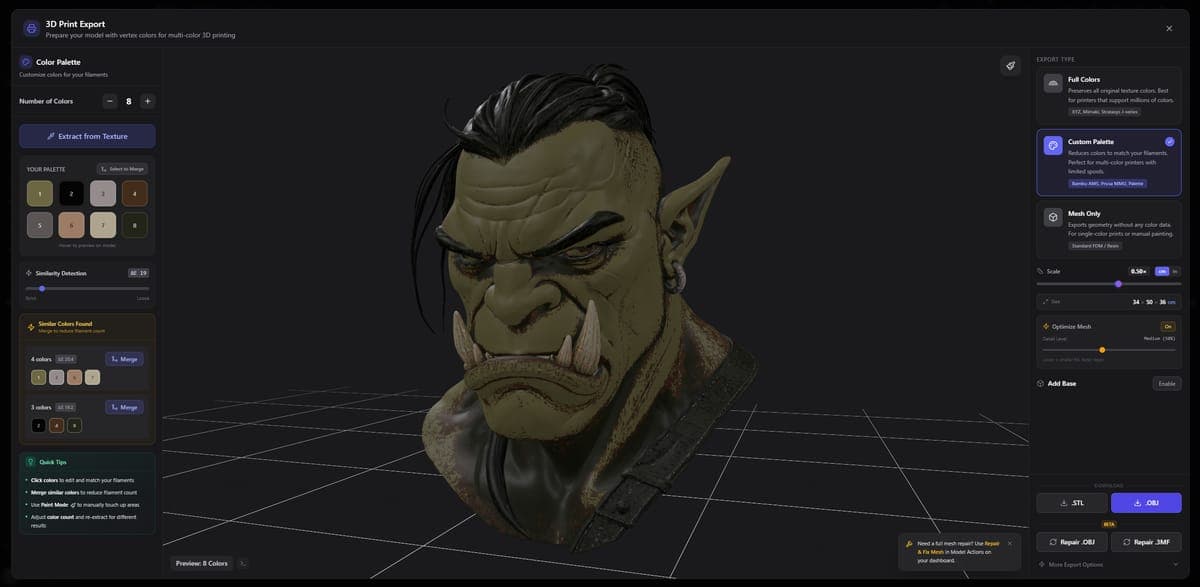
The original 3D Print Export tool turned a textured 3D model into a multi-color print file by converting its texture colors into vertex colors. It mapped those colors to a filament palette and exported 3MF, OBJ or STL for slicers such as Bambu Studio and PrusaSlicer.
| Status | Replaced by Export for 3D Printing on October 1, 2026 |
| Approach | Texture colors converted to per-vertex colors, then mapped to a filament palette |
| Modes | Mesh Only and Palette |
| Exports | 3MF, 3MF Textured, OBJ with vertex colors, STL |
| Extras | Six pedestals, color-aware mesh simplification |
Where did each feature go?
Every task from the old tool still exists, either in Export for 3D Printing or in a dedicated tool.
| Old feature | Now |
|---|---|
| Palette mode (colors mapped to filaments) | Multi-color in Export for 3D Printing, with 1-8 filaments, saved filaments and one-click matching |
| Mesh Only mode | Single color in Export for 3D Printing |
| Similar-color warnings | A suggested number of colors and the Color detail setting (Clean, Balanced, Fine) |
| Six pedestals | Add Base |
| Color-aware simplification | Smart Low Poly or Remesh before exporting |
| 3MF, OBJ, STL export | 3MF, STL, OBJ and GLB in Export for 3D Printing |
| 3MF Textured (full-color printing) | Full color in Export for 3D Printing, as OBJ, VRML, 3MF or PLY for ProJet, PolyJet, Mimaki and HP |
What are vertex colors?
Vertex colors store one color per corner (vertex) of the mesh instead of in a separate texture image. AI-generated models keep their colors in textures, which most slicers cannot read, so converting textures to vertex colors was how the old tool made models printable in color.
Export for 3D Printing still reads textures and vertex colors, but it turns them into clean filament regions and paints them into the 3MF directly, so you no longer manage vertex colors yourself.
How did the old tool work?
The model's textures were converted to vertex colors and its main colors were extracted automatically. In Palette mode, every color was mapped to the nearest filament in your palette, and the result was exported as 3MF for the slicer.
- Open a model from the Dashboard, or upload a GLB
- Textures were converted to vertex colors and the main colors extracted
- Palette mode mapped colors to your filaments
- You adjusted each palette slot to match your spools
- Optionally, you added a pedestal and simplified the mesh
- You exported 3MF, OBJ or STL
Mesh Only vs Palette
| Mesh Only | Palette | |
|---|---|---|
| Colors | Original vertex colors kept | Every color mapped to the nearest filament |
| Color matching | None | Perceptual (CIE LAB Delta-E) |
| Best for | Single-color prints, slicer-side coloring | Bambu Lab AMS, Prusa MMU and similar systems |
Colors closer than Delta-E 28 were flagged as too similar to tell apart on a print.
Export formats
| Format | Contained | Used for |
|---|---|---|
| 3MF | Mesh and colors in one file | Bambu Lab AMS, Prusa MMU, modern slicers |
| 3MF Textured | Mesh and original texture images | Full-color printing |
| OBJ with vertex colors | Mesh and per-vertex RGB colors | Slicer import, editing in Blender |
| STL | Mesh only, no color | Single-color prints |
Pedestals and simplification
The old tool offered six pedestals (Classic Square, Roman Column, Stone Cylinder, Wood Roots, Marble Disc and Cracked Stone), merged into the model so it printed as one piece. Its color-aware simplification reduced the triangle count by a target percentage while keeping color boundaries sharp.
Frequently Asked Questions
No. Both the Dashboard action and the standalone tool page now open Export for 3D Printing, which covers the same workflow with a live preview, automatic watertight repair and up to 8 filaments.
Yes. Choose Multi-color in Export for 3D Printing, set your filaments and download the 3MF. It opens in Bambu Studio with filaments 1 to N already painted on, ready for the AMS.