Recommended Workflow
The best way to create 3D models is to generate or edit a reference image first, then convert it to 3D. This guide shows you the full workflow with real examples.
The best 3D models don't come from typing a prompt into Text to 3D. They come from creating a good reference image first, then converting that image to 3D. This two-step approach gives you way more control over the final result.
This page shows you exactly how to do it, with real examples.
Why Image First?
When you use Text to 3D directly, the AI has to imagine what your object looks like based on words alone. Sometimes it nails it, sometimes it doesn't. And if the result is close but not quite right, you have to rewrite the prompt and try again.
With the image-first workflow, you can:
- See the result before committing to 3D - if the image doesn't look right, edit it
- Control exactly what the model looks like - colors, style, angle, details
- Use photos of real objects - not just text descriptions
- Edit yourself into the scene - turn a selfie into a figurine, LEGO character, etc.
The 3D conversion step is the same either way (Image to 3D with Prism 3.1). The difference is how good your input is.
Workflow 1: Generate an Image, Then Convert to 3D
This is the most common workflow. You create a clean reference image in Image Studio, then send it to Image to 3D.
Steps
- Open Image Studio and go to Generate
- Pick a model (ImageGen 4 for general use, Flux 2 for photorealism)
- Write a prompt describing what you want, with "clean white background" and "single object"
- Generate until you get an image you like
- Open Image to 3D
- Upload the generated image
- Pick Prism 3.1 and generate
Real example: Owl character
Here's what this looks like in practice. We generated an owl character image, then converted it to 3D:
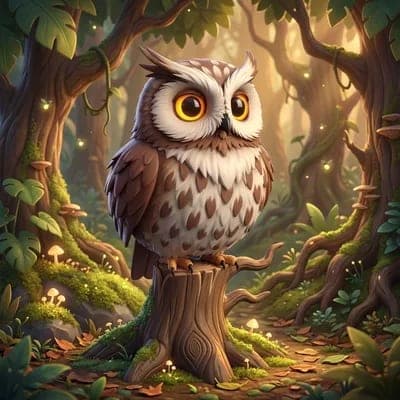
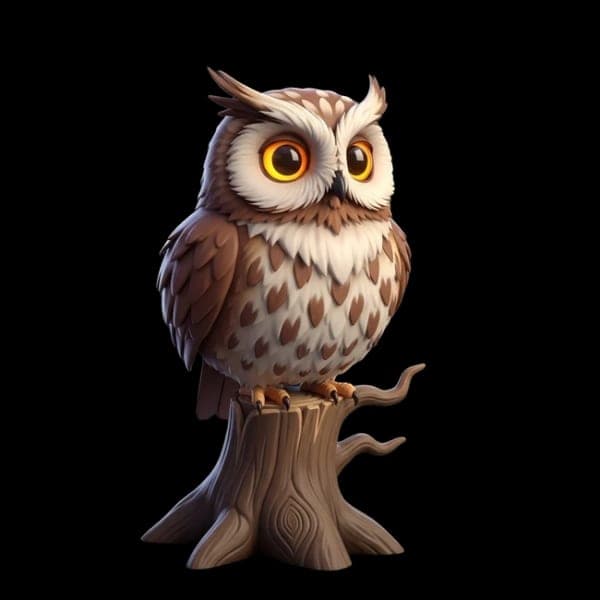
Generated with "stylized 3D cartoon owl, soft lighting, clean white background", then converted to 3D with Prism 3.1.
More examples
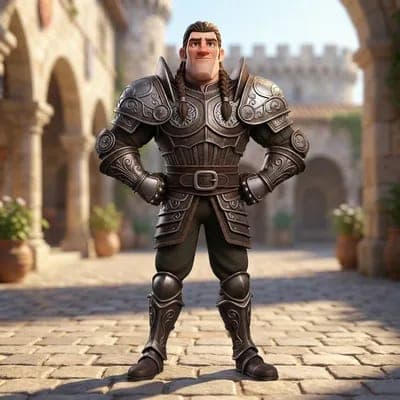
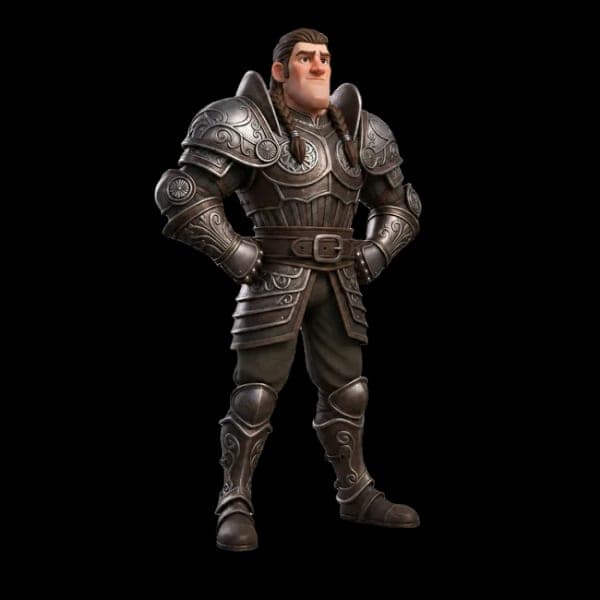
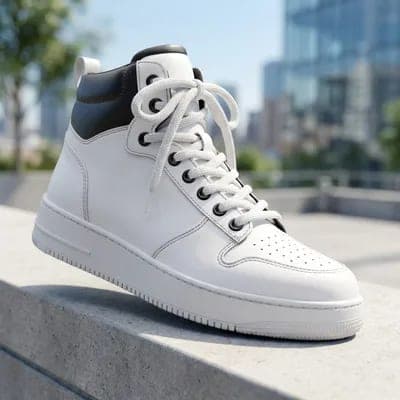
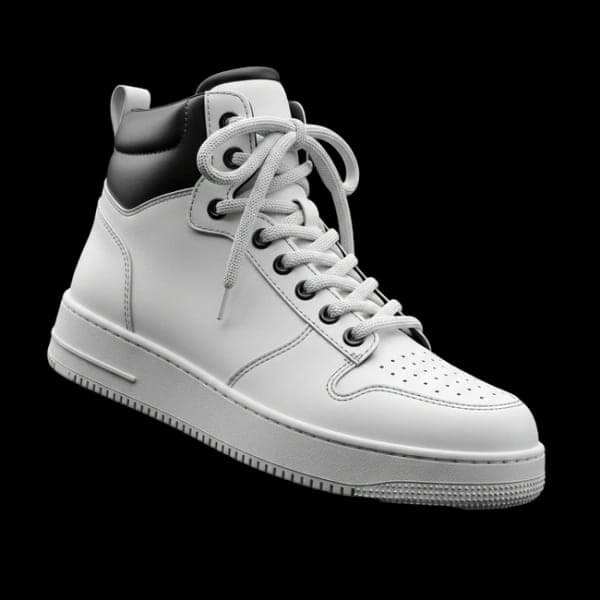
The pattern is the same every time: generate a clean image with one subject, simple background, good lighting, then convert to 3D.
Tips for generating good reference images
- Add "clean white background" or "studio lighting" to your prompt
- Include "single object, centered" to keep it simple
- Use "3D render style" or "stylized 3D" for images that convert better than flat illustrations
- Generate a few variations and pick the best one before converting to 3D
- If the image is almost right, edit it in Image Studio before converting (see Workflow 2)
Workflow 2: Edit a Photo, Then Convert to 3D
Already have a photo? You can edit it into something that converts to 3D really well. This is especially useful for personalized figurines, product models, or turning real objects into 3D.
Steps
- Open Image Studio and go to Edit
- Upload your photo
- Pick GPT-Image-2 Edit or Gemini Edit
- Write an edit prompt (e.g. "turn this person into a LEGO minifigure, plastic material, clean background")
- Download the edited image
- Open the image to 3D model generator and upload it
- Generate with Prism 3.1
Real example: Photo to LEGO figurine to 3D print
This is the full pipeline. We took a regular photo, edited it into a LEGO-style figurine, converted to 3D, and 3D printed the result:
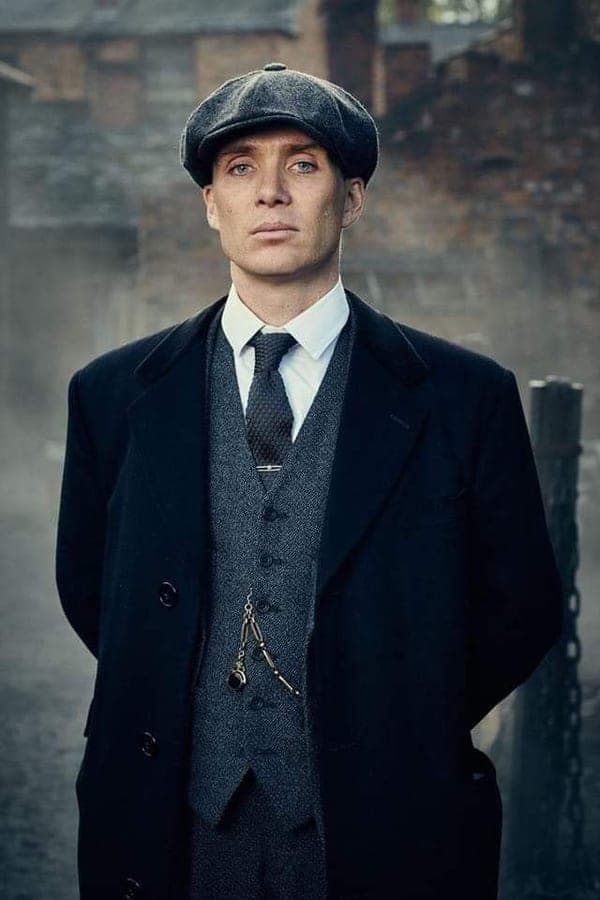
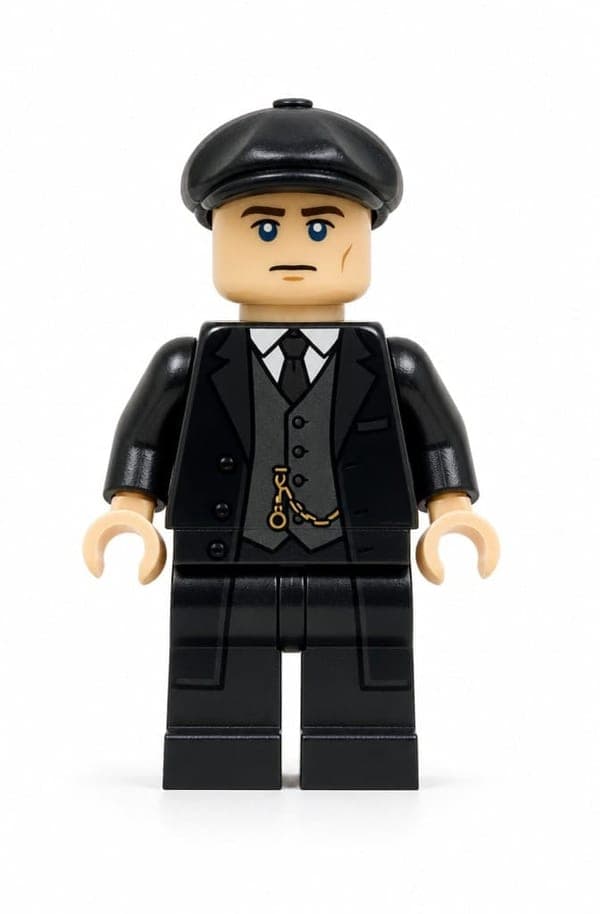
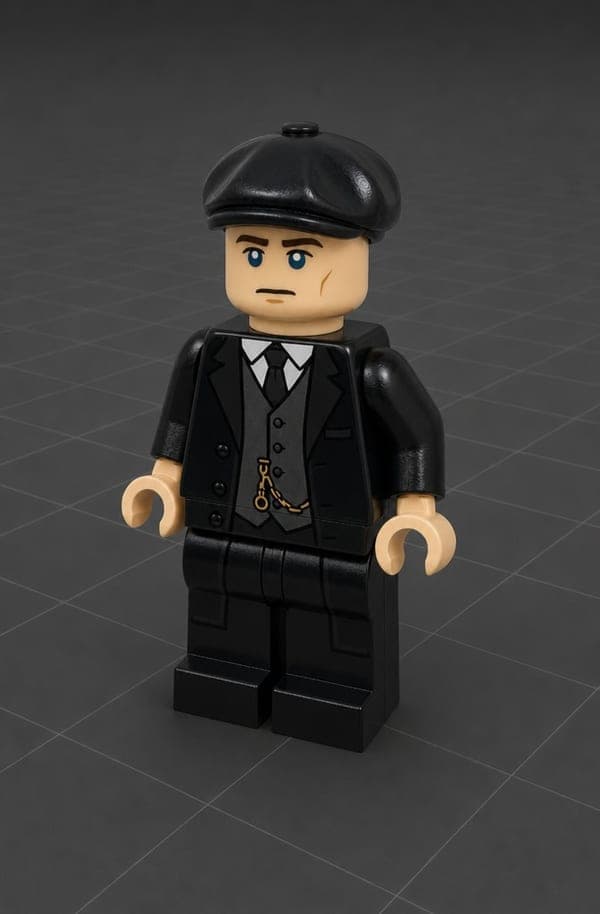
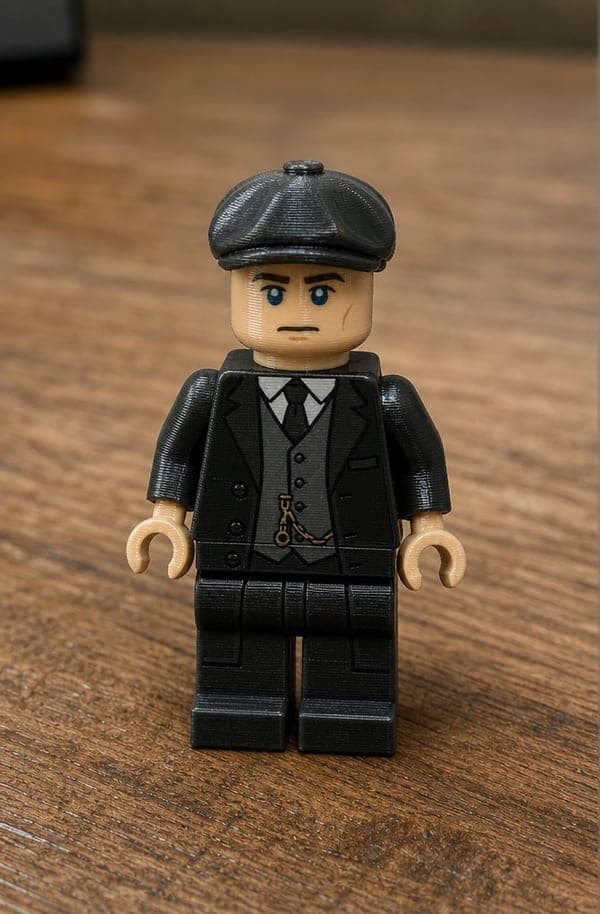
Photo, AI edit, 3D model, 3D print. The whole thing takes about 5 minutes (not counting print time).
Real example: Generated LEGO orc
You can also combine Workflow 1 and 2. Here we generated a LEGO orc from scratch in Image Studio, then converted to 3D:
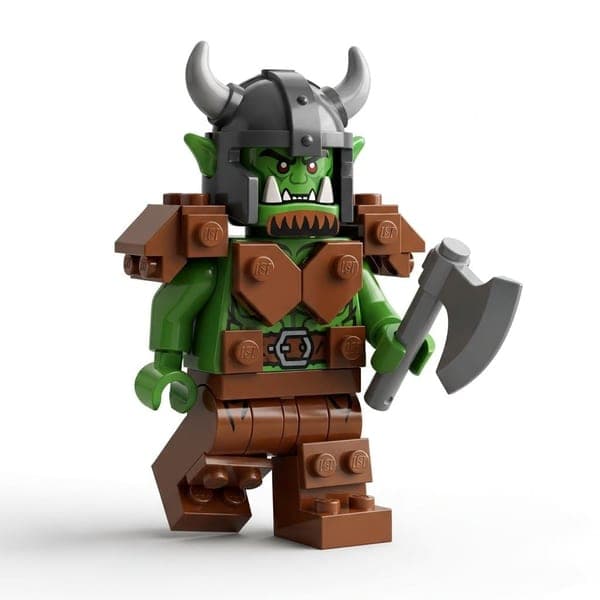
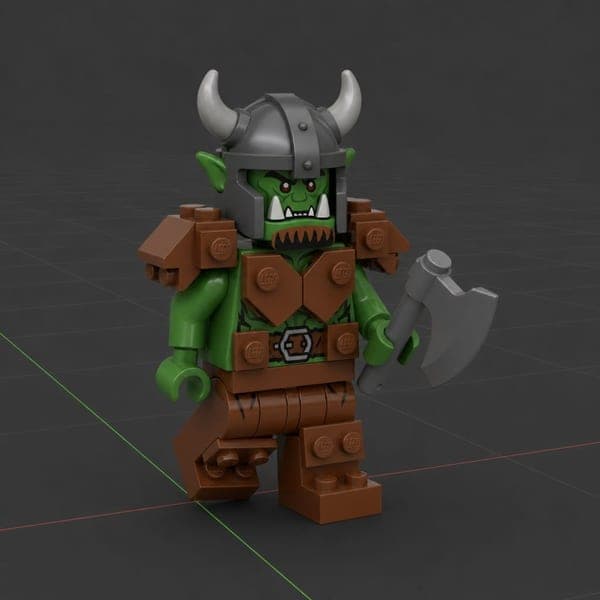
The prompt was something like "LEGO minifigure of an orc warrior, green skin, armor, plastic material, studio lighting, white background" using ImageGen 4.
Good edit prompts for 3D conversion
| What you want | Edit prompt |
|---|---|
| LEGO figurine of yourself | "turn this person into a LEGO minifigure, plastic material, blocky proportions, full body, clean background" |
| Pixar-style character | "turn into a Pixar-style 3D character, stylized, big eyes, clean background" |
| Funko Pop figurine | "turn me into a Funko Pop figurine, full body, clean background" |
| Clean product shot | "remove the background, keep the product exactly as is, white background" |
| Stylized 3D version | "turn into a stylized 3D render, clean lighting, white background" |
Workflow 3: Sketch to 3D
Have a hand-drawn sketch or concept drawing? You can turn it into a full 3D model by rendering it first in Image Studio.
Steps
- Open Image Studio and go to Edit
- Upload your sketch (photo of a drawing, digital sketch, or rough concept)
- Use GPT-Image-2 Edit or Gemini Edit with a prompt like "render this sketch as a detailed 3D model, stylized, clean background"
- The AI turns your rough sketch into a polished, render-ready image
- Upload that rendered image to Image to 3D AI
- Generate with Prism 3.1
Real example: Orc character from sketch
A rough pencil sketch becomes a fully rendered character, then a 3D model:
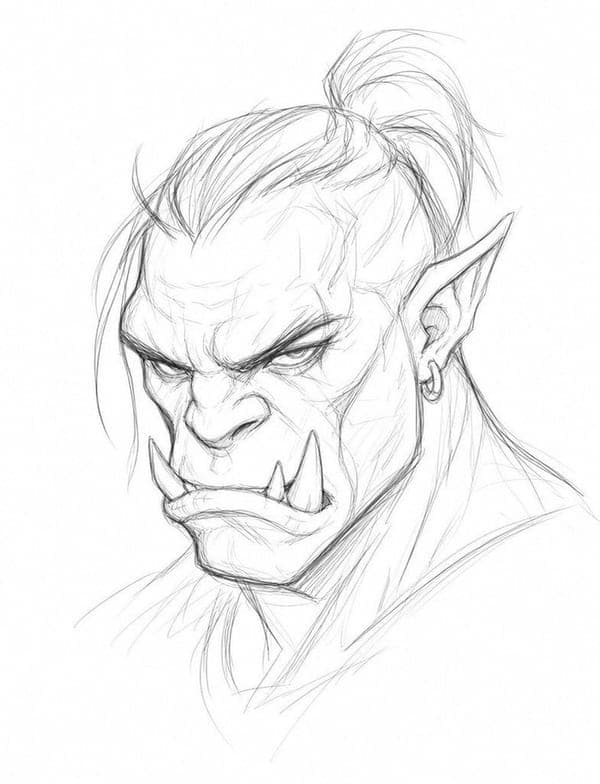
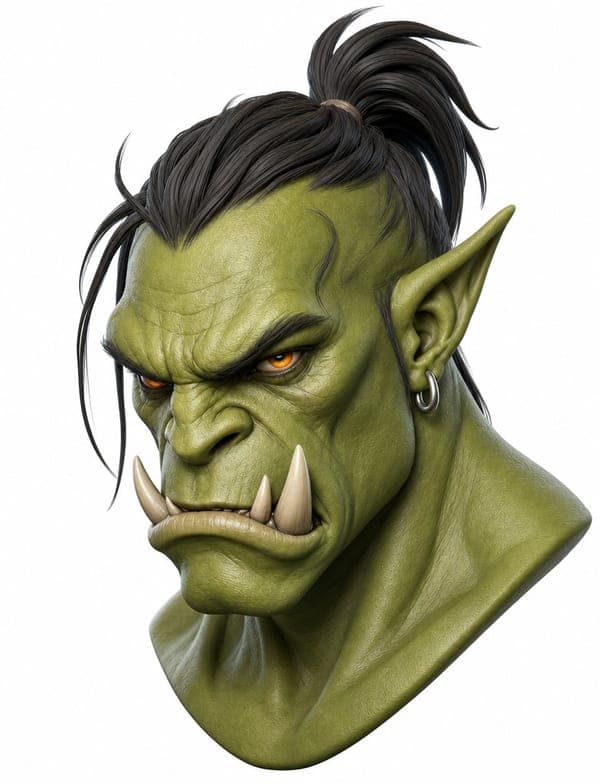
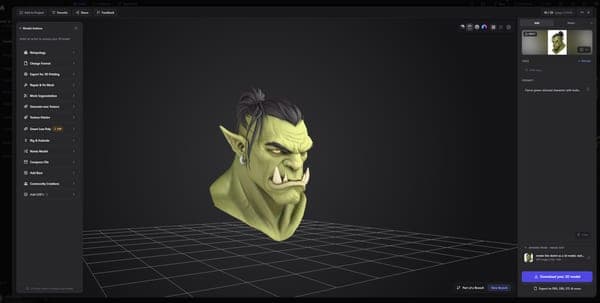
Sketch, AI render, 3D model. The rough pencil drawing was uploaded to Image Studio Edit with the prompt "render this sketch as a 3D model, stylize". The AI produced the detailed character render. That render was then uploaded to Image to 3D with Prism 3.1 to get the final 3D model.
Tips for sketch to 3D
- Clean line art works best - clear outlines with minimal construction marks
- Add basic shading to your sketch if possible - it helps the AI understand depth and volume
- Three-quarter angles convert better than straight front views
- Digital sketches tend to work better than photos of paper drawings (less noise)
- If your sketch is on paper, photograph it with even lighting and crop tightly around the subject
Workflow 4: Direct Photo to 3D (Quick and Simple)
If you just want a quick 3D model from an existing photo without editing, you can skip Image Studio and go straight to Image to 3D:
- Open Image to 3D
- Upload your photo
- Pick Prism 3.1
- Generate
This works well for:
- Product photos with clean backgrounds
- Concept art and illustrations
- Toys and objects photographed on a table
- Character art and drawings
It works less well for:
- Photos with busy backgrounds (edit first to remove the background)
- Multiple objects in one image (crop to just one)
- Very dark or blurry photos (edit first to improve quality)
When to Use Text to 3D Instead
Text to 3D is still useful when:
- You want a quick concept and don't care about exact appearance
- You're exploring ideas and want fast iterations
- The object is simple enough to describe in words (a sword, a potion bottle, a chair)
- You don't have any reference image at all
But for anything where the look matters, the image-first workflow will save you time and give you better results.
Quick Reference
| Situation | Workflow | Time |
|---|---|---|
| I have an idea but no image | Generate image in Image Studio, then Image to 3D | ~5 min |
| I have a photo of myself | Edit photo in Image Studio, then Image to 3D | ~5 min |
| I have a sketch or drawing | Render sketch in Image Studio Edit, then Image to 3D | ~5 min |
| I have a product photo | Upload directly to Image to 3D (or remove background first) | ~3 min |
| I have concept art | Upload directly to Image to 3D | ~3 min |
| I want a quick rough model | Text to 3D directly | ~3 min |
| I want to 3D print a figurine | Edit photo to figurine style, Image to 3D, export STL | ~10 min |
Open Image Studio - Open Image to 3D - Open Text to 3D
Frequently Asked Questions
When you type a prompt into Text to 3D, the AI has to guess what your object looks like. With the image-first workflow in 3D AI Studio, you see the exact reference image before spending credits on 3D generation. You can edit colors, fix proportions, remove backgrounds, and iterate cheaply on the 2D image until it's perfect. This leads to far more predictable 3D results.
A typical run in 3D AI Studio costs around 40-50 credits total. Image generation is about 5-10 credits depending on the model, and Image to 3D with Prism 3.1 costs 35 credits. That's slightly more than Text to 3D alone (25-60 credits), but you get much more control over the outcome. Image editing adds another 5-10 credits if needed.
The best approach in 3D AI Studio is the image-first workflow. Instead of going straight to Text to 3D, generate a reference image first in Image Studio, edit it until it looks exactly right, then convert it to a 3D model using Image to 3D. This gives you much more control over the final result because you can perfect the 2D image cheaply before committing credits to 3D generation. Image generation costs 2-8 credits while 3D generation costs 25-60, so iterating in 2D saves both time and credits.
Yes, and it works surprisingly well. Upload your sketch to Image Studio Edit in 3D AI Studio and use a prompt like "render this sketch as a detailed 3D model, clean background." The AI turns your rough drawing into a polished render, which you then convert to 3D with Image to 3D. Clean line art with some basic shading converts best.
ImageGen 4 in 3D AI Studio works great for stylized and cartoon objects. Flux 2 is better for photorealistic subjects. Both produce images that convert well to 3D. The key is adding "clean white background" and "single object, centered" to your prompt regardless of which model you pick.
Upload your photo to Image Studio Edit in 3D AI Studio and use a prompt like "turn this person into a LEGO minifigure, plastic material, full body, clean background." Once the edited image looks good, send it to Image to 3D with Prism 3.1. Export as STL for 3D printing. The entire process takes about 5 minutes.
Absolutely. Many game developers use 3D AI Studio's image-first workflow to rapidly prototype assets. Generate a concept in Image Studio with style keywords like "low-poly" or "game asset," then convert to 3D with Prism 3.1 or Tripo P1 Game Ready. The output can go straight into Unity or Unreal after a quick retopology pass if needed.
Solid white or transparent backgrounds give the best results in 3D AI Studio. Studio lighting setups also work well. The goal is to isolate your subject clearly so the AI doesn't create unwanted geometry from background elements. If your source image has a busy background, use Image Studio's background removal tool before converting.
Yes, many users mix approaches in 3D AI Studio. For example, you might generate a character's body with the image-first workflow, then generate accessories separately with Text to 3D, and combine everything in Blender. You can also generate multiple angle references in Image Studio and use a multi-view model for more accurate reconstruction.
From start to finished 3D model, the image-first workflow in 3D AI Studio typically takes about 5 minutes of active work. Image generation takes seconds, editing (if needed) takes a minute or two, and Prism 3.1 generates the 3D model in 3-5 minutes. Direct photo to 3D (without editing) is even faster at about 3 minutes total.
That's the beauty of the image-first approach. In 3D AI Studio, you can edit the generated image before converting to 3D. Fix colors, remove unwanted details, change the background, or adjust proportions using Image Studio Edit. Each edit costs only 5-10 credits, which is much cheaper than regenerating the entire 3D model if something is off.