3D Stager
Stage 3D models in virtual scenes with lighting and materials, then render photorealistic product photos using AI.
The 3D Stager lets you place your 3D models into virtual scenes, adjust lighting and camera angles, and then render photorealistic product photos using AI. Instead of hiring a photographer or building a physical set, you can generate professional product images directly from your 3D models.
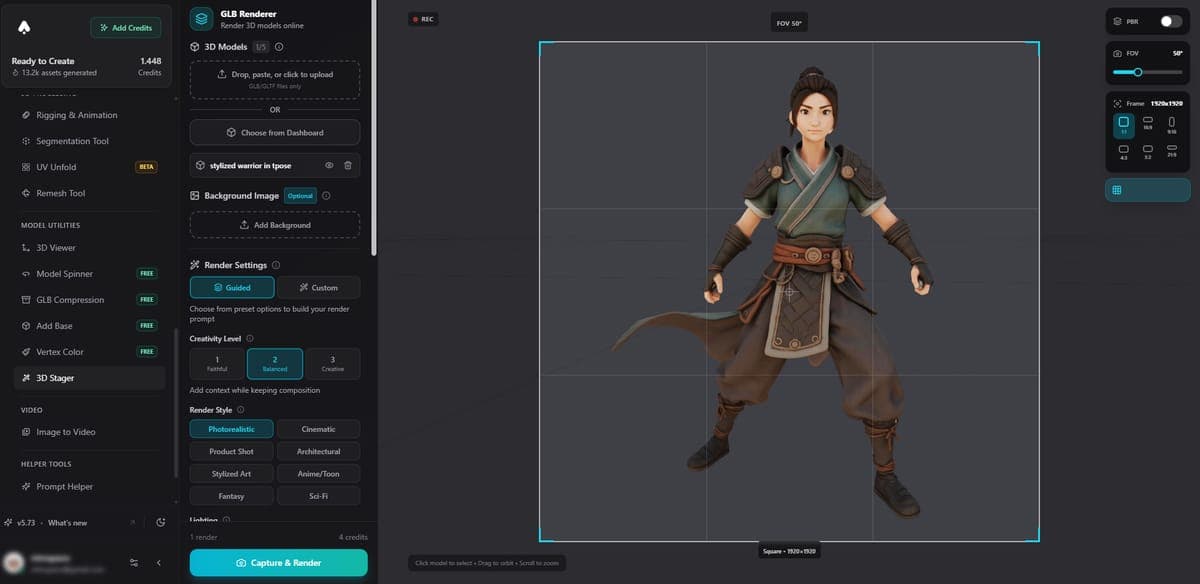
How it works
- Upload a GLB model or select one from your Dashboard
- Place it in a scene with a surface and background
- Adjust the lighting, shadows, and camera position
- Write a prompt describing the desired look (or use the defaults)
- Choose an AI model and render
The AI takes your staged scene as input and generates a photorealistic image that matches the composition, lighting direction, and model placement you set up.
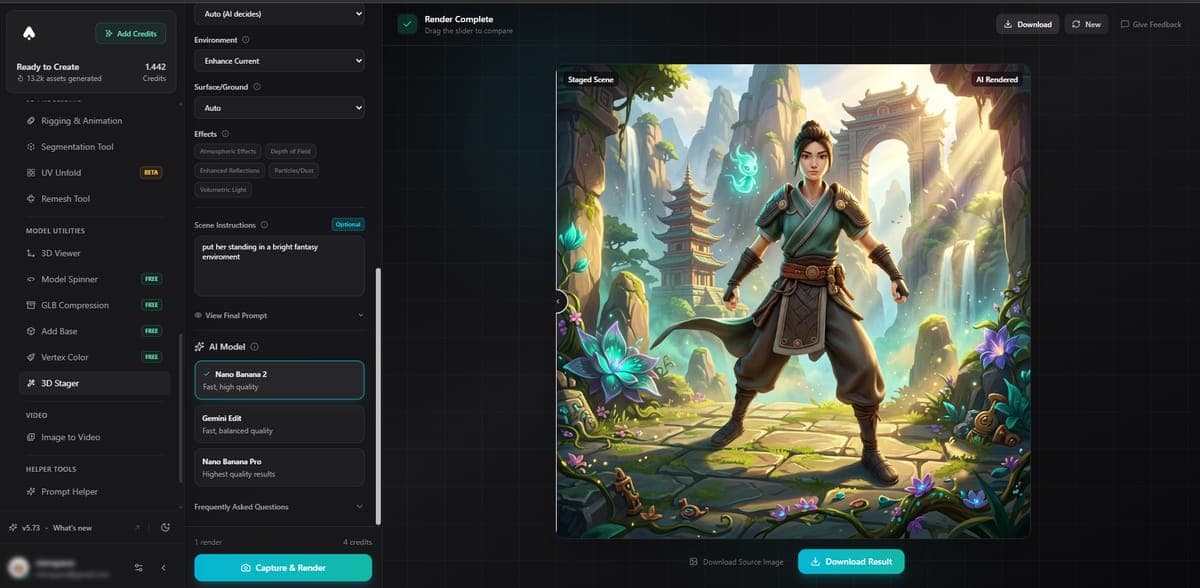
AI render models
Three rendering models are available, each with different strengths:
| Model | Credits | Best for |
|---|---|---|
| Nano Banana 2 | 4 | Fast renders, good general quality |
| Gemini Edit | 4 | Strong prompt adherence, detailed textures |
| Nano Banana Pro | 6 | Highest quality, best lighting and reflections |
Scene controls
Surface - Choose a flat surface material (wood, marble, concrete, fabric, or custom color).
Lighting - Adjust intensity, direction, and color temperature. The AI uses your lighting setup as a guide for the final render.
Camera - Orbit freely or pick preset angles (front, three-quarter, top-down). The composition you see is what the AI receives.
Prompt - Describe the environment or mood you want. For example: "product on a marble countertop, soft morning light, minimal background." The AI blends your scene setup with the text prompt.
Tips for best results
- Position the model so it fills most of the frame
- Keep lighting simple and directional for clean shadows
- Use short, descriptive prompts rather than long detailed ones
- Try multiple AI models to see which suits your product style
Related Tools
- Want turntable videos instead? Use the Model Spinner
- Need to view models interactively? Try the 3D Viewer
- Want to add textures before staging? Use the Texture Generator
- Generate models to stage with Image to 3D or Text to 3D
Frequently Asked Questions
Yes. 3D AI Studio's 3D Stager lets you place your model in a virtual scene, set up lighting and camera angles, and render photorealistic product photos using AI. You get professional-looking images in seconds without any physical setup, studio, or camera equipment.
Each AI render in 3D AI Studio's 3D Stager costs 4-6 credits depending on which rendering model you choose. Nano Banana 2 and Gemini Edit cost 4 credits each, while Nano Banana Pro costs 6 credits and produces the highest quality output with better lighting and reflections.
You can choose from surface materials like wood, marble, concrete, and fabric, then write a text prompt to describe the environment you want. For example, "product on a marble countertop, soft morning light, minimal background." 3D AI Studio's AI blends your scene setup with the prompt to generate the final image.
Start with Nano Banana 2 (4 credits) for quick tests and general use. Try Gemini Edit (4 credits) when you need strong prompt adherence and detailed textures. Use Nano Banana Pro (6 credits) from 3D AI Studio for your final hero shots where lighting quality and reflections matter most.
ZIP Export
Bundle up to 50 images, 3D models, and videos into a single ZIP archive. Name your export, organize it into folders, and get an email when it's ready.
Model Storage & Expiry
How long generated 3D models stay in your library, how to see a file's storage date, how to extend storage to 3 years, and what happens when a file expires.