Nodes Reference
Updated June 2026
Nodes are the building blocks of every pipeline. Each node is a card on the canvas that performs one job. This page first explains the system that all nodes share (handles, data types, and common controls), then documents every node grouped by category.
How handles and data types work
Every node has handles, the small dots on its edges. Inputs sit on the left, outputs on the right. You pass data from one node to another by wiring an output handle to an input handle.
Each handle has a data type, and you can only connect handles of the same type. This is the single most important rule in Flow, and it is what stops you from building broken pipelines. The types are color coded:
| Color | Type | Carries |
|---|---|---|
| Red | text | A prompt or any string of text |
| Blue | image | A single image |
| Indigo | imageset | An ordered group of images (from a moodboard, for example) |
| Green | mesh | A 3D model |
| Amber | number | A numeric value such as a seed |
| Violet | llm | Text produced by a language model |
| Cyan | viewers | A passthrough used by viewer nodes |
A few handle behaviors to know:
- Hollow ring means an optional input that is not connected yet. Filled dot means it is required or already connected.
- Single input handles accept one wire only; connecting a new wire replaces the old one. Multiple input handles reveal extra slots as you connect more wires.
- Click a connected dot to disconnect that wire.
Controls every node shares
No matter what a node does, its header and body give you a consistent set of controls:
- Title and icon identifying the node.
- Duplicate to clone the node with its settings.
- Delete to remove it.
- Tag to apply a color tag for organization.
- Collapse to shrink the node to a compact card (its handles stay so wires remain connected).
- Bypass (mute) on generation nodes, which makes the node pass its input straight through without running. Press
Bwith a node selected to toggle this. - During a run, a colored ring and a small number badge show the node’s status and its position in the execution order.
Generation nodes also keep their result built into the node (rather than spawning a separate node), so your downstream wiring stays attached even when you regenerate. They show a history filmstrip of previous results that you can click through.
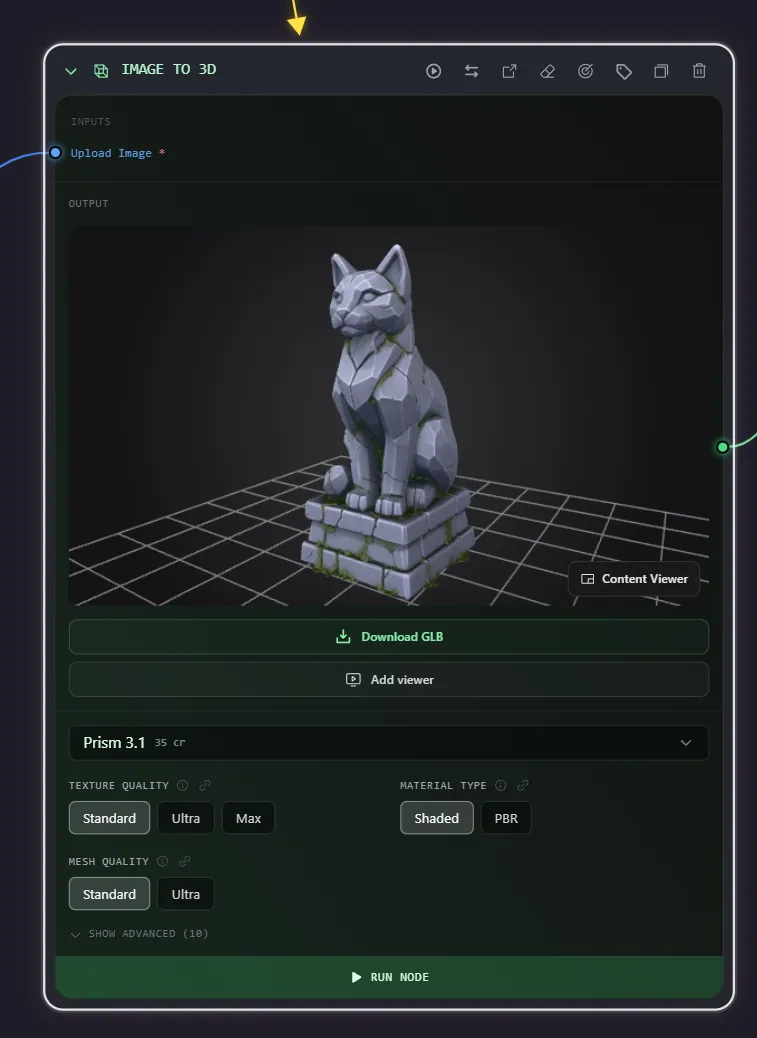
A generation node with its model picker at the top, the generated result built into the node, and the run bar at the bottom. Input handles sit on the left, the output handle on the right.
Input and source nodes
These nodes bring data into your pipeline. They are starting points, so they have nothing to wire in and instead produce an output you wire onward.
Prompt (Text Input)
The basic text box. Type your prompt and it flows out as text. You can resize it by dragging the corner. If you write something reusable, you can save it as a “pre prompt” custom node.
- Output: text
Image
An image source or result. When empty it acts as a dropzone where you can upload a file or pick one from your Dashboard. When filled it displays the picture with download and history controls. Generation results often pop out into one of these.
- Output: image
Images (multi image)
Holds up to ten images in one node, each in its own slot with its own output handle. This lets you wire several individual pictures downstream independently. Great when you want one node to feed many images into different places.
- Output: one image handle per slot

The Images node holds several pictures in one place, each with its own output so you can wire them downstream independently.
Moodboard
A pinboard of up to ten reference images that drives style. Its main output is a single ordered image set wire you connect to a Style Reference or Edit node. You can drag to reorder the pinned images, and there is a one click “Add Style Reference and connect” button that wires up a style edit for you.
- Inputs: progressive image slots
- Output: image set (plus optional per image handles)
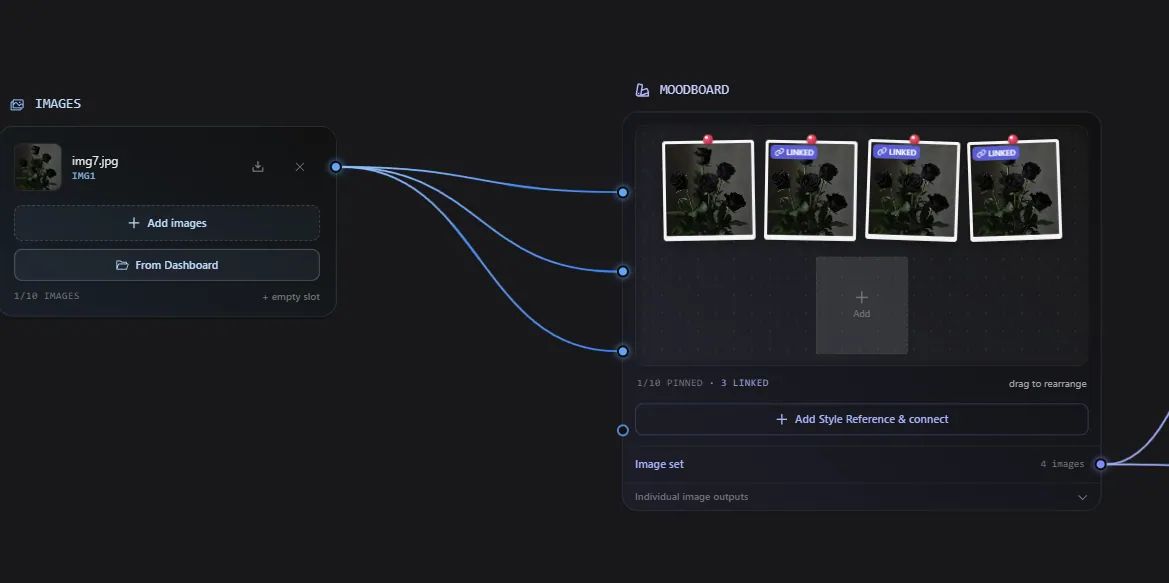
The Moodboard node collects reference images and outputs them as one ordered image set to drive a consistent style.
3D Model
A 3D source or result. When empty it lets you drop a model file (GLB, GLTF, STL, FBX, OBJ) or pick one from your Dashboard. When filled it shows a live, rotatable 3D preview with download and history.
- Output: mesh
Model Upload and Image Upload
Minimal dropzones for adding a 3D file or an image into the pipeline.
File
A terminal node that surfaces a downloadable file, such as an export. It takes an input and gives you a download button. It has no output (it is an end point).
- Input: generated result
Text operator nodes
These transform or produce text instantly and without using credits (except the LLM node).
Combine Prompts
Joins up to ten incoming prompts into one, in top to bottom order, with a separator you choose (comma, space, or new line). Instant, no credits. Useful for assembling a prompt from reusable pieces.
- Inputs: up to ten text prompts
- Output: text
LLM
Sends a prompt (and optionally up to six images) to a language model and outputs the resulting text. You pick a tier (Fast, Balanced, or Smart). Use it to write or refine prompts inside your pipeline, or to reason over images.
- Inputs: prompt, optional images
- Output: text
Pre Prompt (custom)
A reusable text operator that attaches a fixed prefix or suffix to whatever prompt you wire in. You create these from a Prompt node. Handy for always prepending a style instruction.
Image generation nodes
These call AI models to create or edit images. They all work the same way: pick a model, wire in its inputs, and the result appears right in the node, with a history of previous results and per node settings.
Generate Image
Turns text into an image. Pick from the curated image models and write a prompt.
- Input: prompt (plus any settings you expose as handles)
- Output: image
Edit Image
Edits one or more images using a text instruction, for example “make the background white” or “add a hat”. Accepts individual images or a whole image set from a moodboard.
- Inputs: image(s) or an image set, plus a prompt
- Output: image
Style Reference
A specialized edit that generates something new in the visual style of the reference images you give it. It is tuned for style transfer, so you only need to describe what to generate.
- Inputs: style reference images, prompt
- Output: image
Remove Background
Cuts out the subject and produces a transparent image. No prompt needed.
- Input: image
- Output: image (transparent)
Pose Changer and Optimize Image (curated one click edits)
These are simplified, opinionated edit nodes locked to a single high quality edit model. Instead of writing a prompt, you flip simple toggles:
- Pose Changer repositions a character to a T pose, A pose, or neutral pose while keeping its identity.
- Optimize Image cleans an image up with toggles for centering, facing front, white background, removing clutter, and sharpening.
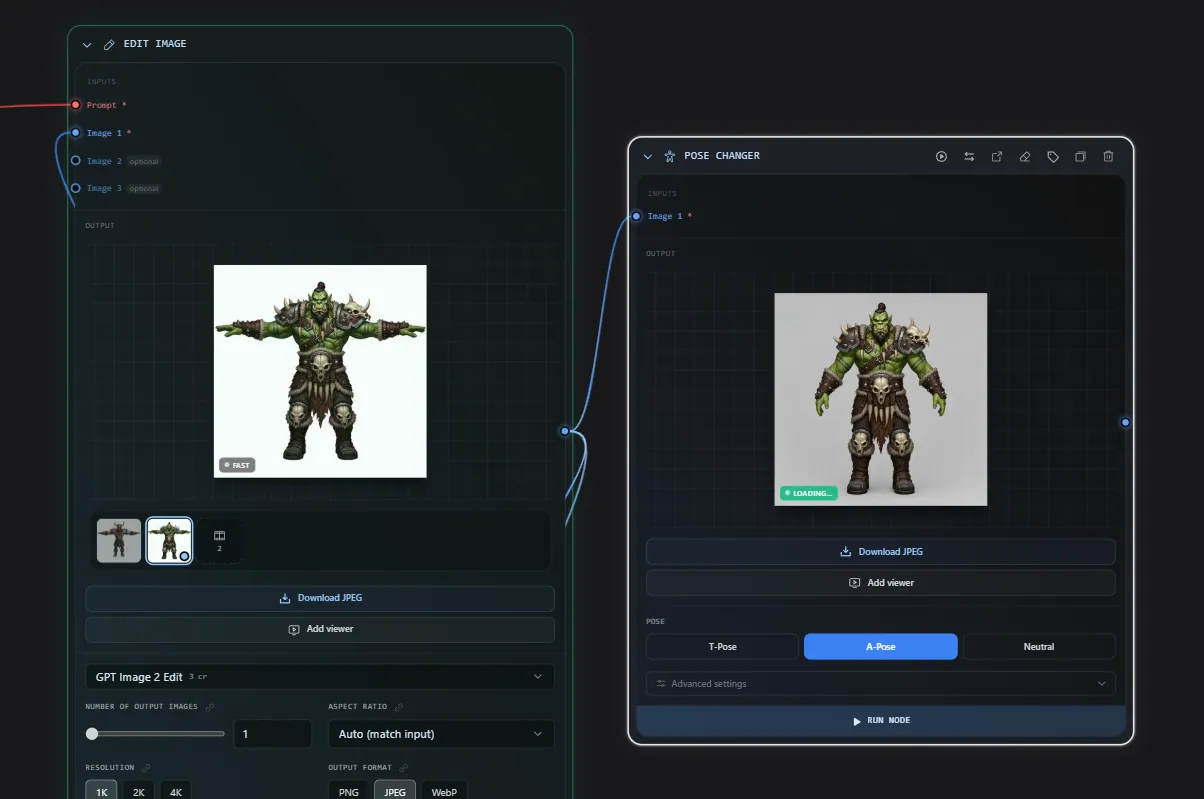
The Pose Changer node. Pick a target pose and it repositions the character while keeping its identity.
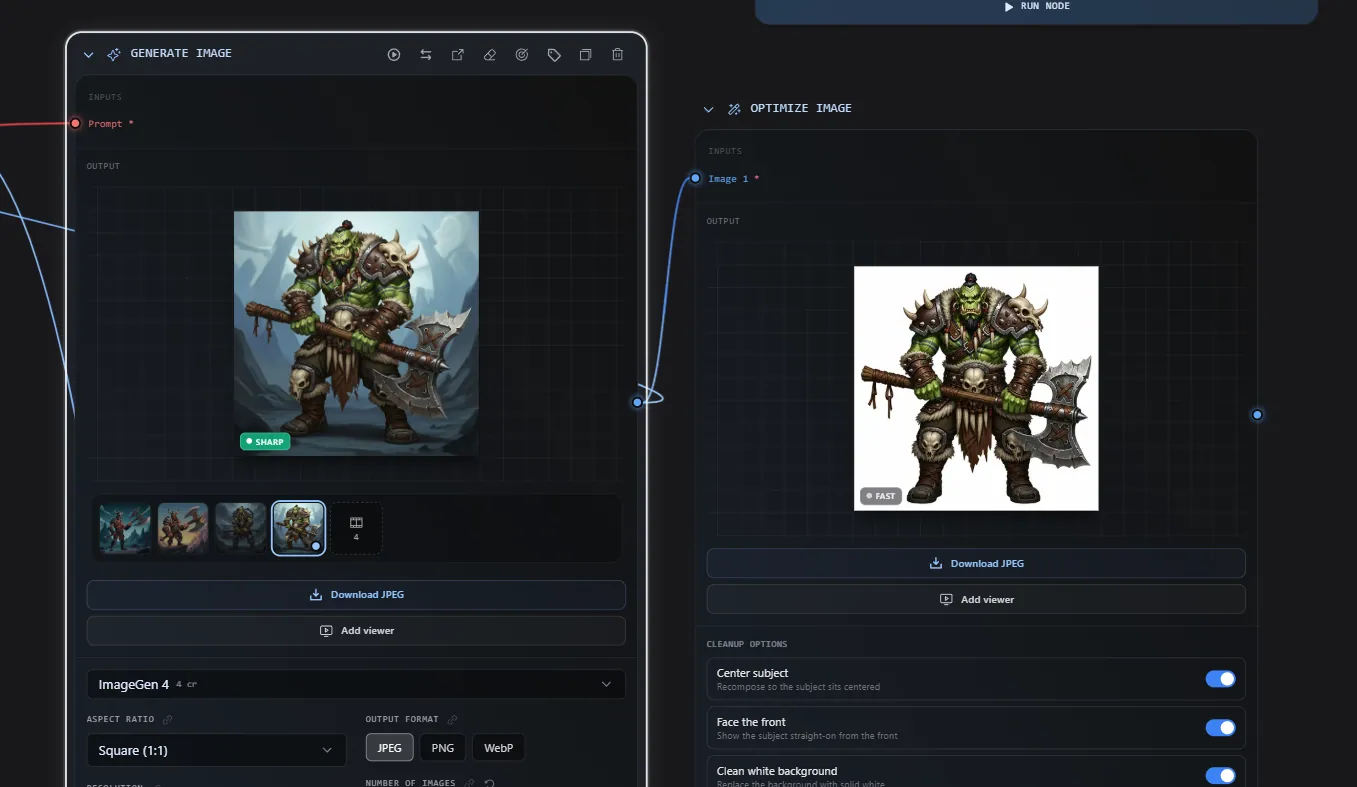
The Optimize Image node. Flip simple toggles instead of writing a prompt.
3D generation and derivation nodes
These create or transform 3D models.
Image to 3D, Multi View to 3D, Text to 3D
Three nodes, one per input mode, each scoped to the matching model category so the default model and drag to connect work on the first try. These use the same models as the standalone Image to 3D generator:
- Image to 3D turns a single image into a model.
- Multi View to 3D takes front, left, right, and back views (its handles line up exactly with the Multi View and Render Views nodes).
- Text to 3D generates a model straight from a prompt.
All three output a mesh.
Texture 3D, Retopology (Remesh), Convert Format
These operate on an existing 3D model:
- Texture 3D applies a new texture to a model.
- Retopology (Remesh) rebuilds the mesh with cleaner topology.
- Convert Format changes the file format.
Each takes a mesh input (plus an optional prompt or image depending on the model) and outputs a mesh.
Image processing and transform nodes
These reshape image data, mostly without generating anything new.
Multi View
Takes one image and produces four orthographic views (front, left, right, back), each as a separate output. When all four are ready it offers a one click “Create 3D model” button that wires them into a Multi View to 3D node.
- Input: image
- Outputs: front, left, right, back images
Render Views (experimental)
The inverse of Multi View: wire in a 3D model and it renders turnaround images locally, with no credits used. You choose the capture style (textured, unlit, clay, normals) and resolution.
- Input: mesh
- Outputs: an image set plus per view images
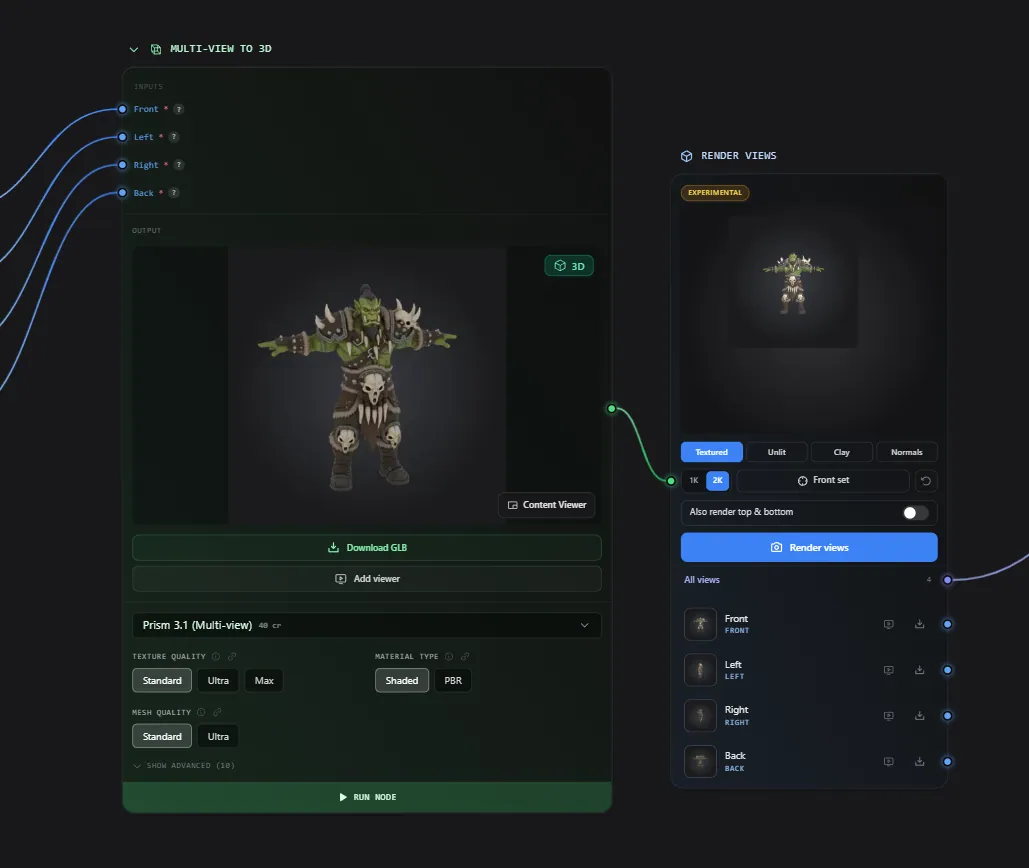
Render Views takes a 3D model and renders turnaround images locally, with no credits used.
Combine to Grid and Split Grid
A pair for consistent multi image editing:
- Combine to Grid tiles several images into one contact sheet so an Edit node can edit them together, and records a layout for splitting them back.
- Split Grid crops that edited grid back into individual images using the recorded layout.
Combine to Grid even has a “Set up consistent edit” button that wires up the whole Combine, Edit, Split chain for you.
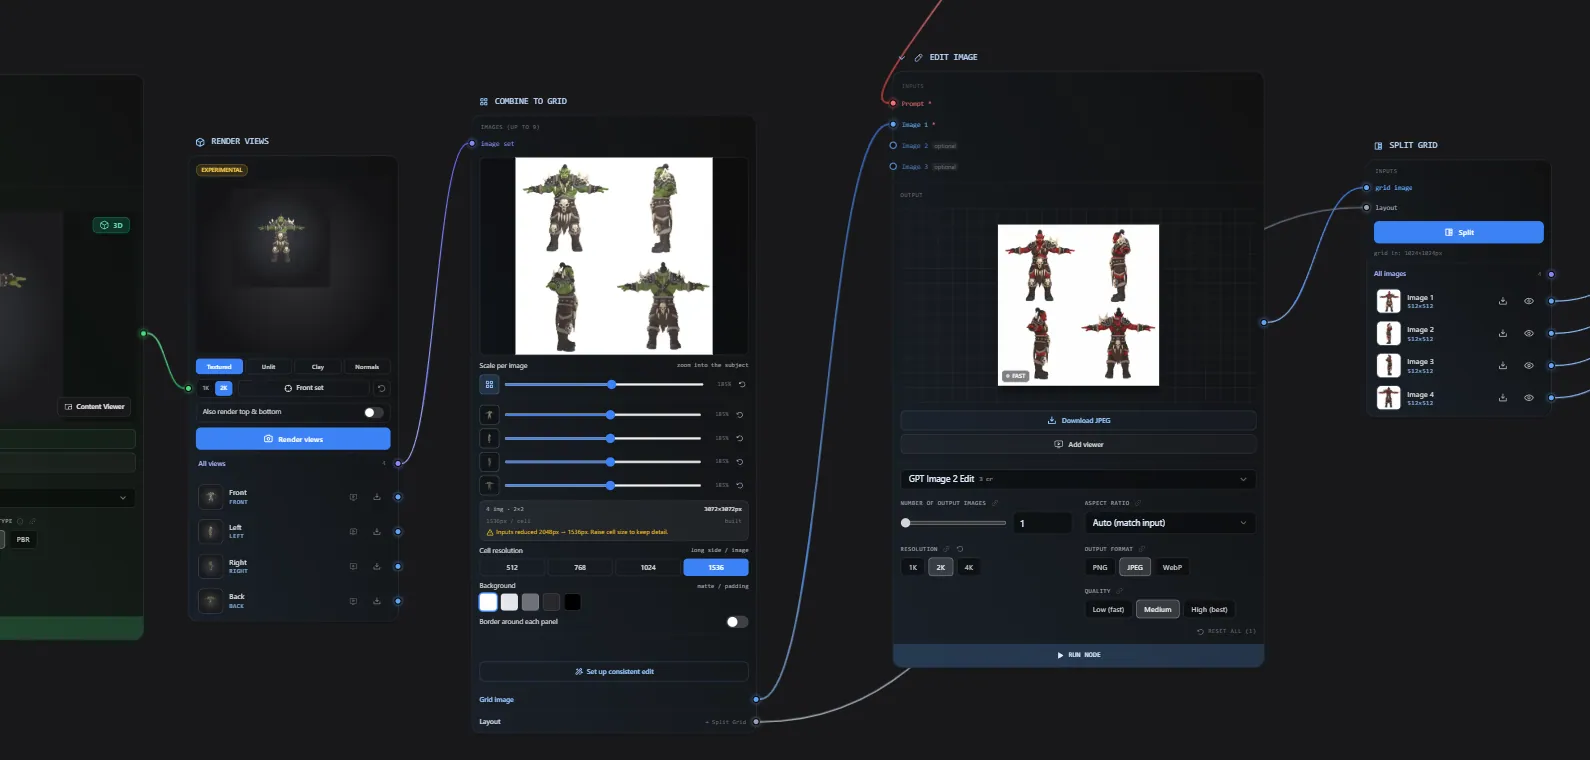
A consistent edit workflow: Render Views feeds a Combine to Grid, which is edited as one image, then Split Grid breaks it back into individual pictures.
Split into Parts
Drop in a character image and this node detects its parts automatically, shows you an editable checklist, then isolates each part as its own image. Each part gets both an image output and a text output (the extraction prompt).
- Input: image
- Outputs: per part images, an “all parts” image set
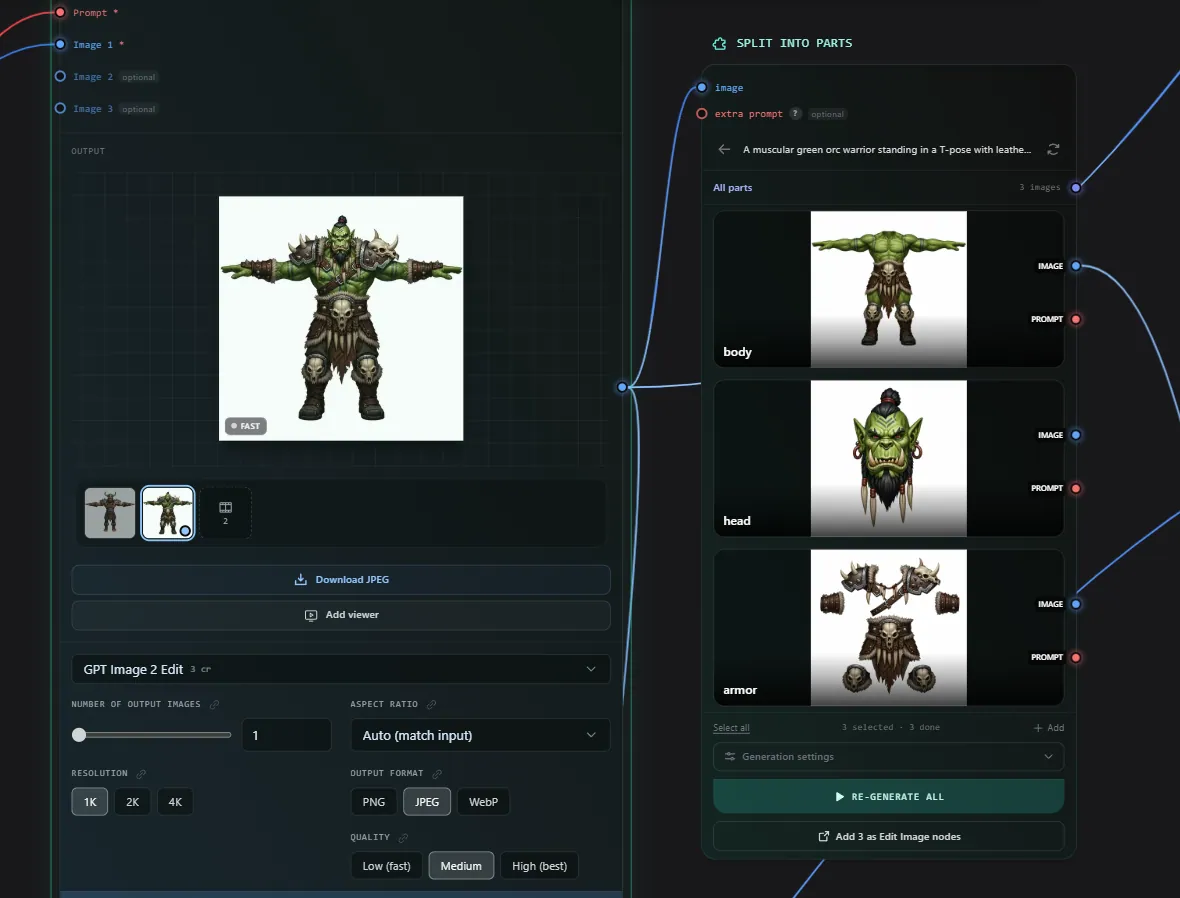
Split into Parts detects the pieces of a character, then isolates each one as its own image.
Collect Results
Taps a generator’s history filmstrip and republishes its results as separate outputs, so every variation or batch result can flow downstream, not just the one active result on the generator’s own output. It generates nothing itself.
- Input: one image or one mesh source
- Outputs: an All results image set (2D only) plus fixed numbered slots out1…outN
- Pick the format (2D images or 3D meshes) and how many slots you want (1 to 10); the newest results fill the slots live.
This is the key bridge for chaining batches. A batched generator only puts its latest result on its output, so to pass all of its results into another Batch, add a Collect after it and wire from its All results image set (not the numbered slots, which are capped by the slot count). See Batch.
Logic and control nodes
These are pure operators that route or hold values. They never call a model and cost no credits.
Switch
Routes exactly one of several same type inputs to its output. It has two modes: manual (you click a row to pick the active input) and auto (the first wired input that has content wins). The active branch is drawn inside the node. When a flow runs, only the selected branch executes, so a Switch is a real fork in your pipeline.
- Inputs: several of the same type
- Output: that type
Seed
Holds a random seed and outputs it as a number, so generators stay reproducible. You can set it to stay fixed or roll a new value each run.
- Output: number
Variable
A named, typed value: text, number (with a slider), or a choice from a list. Variables are designed to be promoted into the run panel as a form field, turning your flow into a simple app. See Running Flows.
- Output: text or number
Batch
Runs the node it feeds once per item, a “for each” over a collection of images, prompts, or 3D models. The Batch node is passive: it holds the collection and never runs itself; the generation or derivation node wired to its output is what repeats.
- Input: several images or an image set, several prompts, or several 3D models (typed by the chosen mode)
- Output: the same type, as a collection
How to use it:
- Pick a type (Images, Prompts, or 3D) with the toggle at the top.
- Fill it either way:
- Manually by dragging, dropping, or pasting images, or typing one prompt per line.
- By wiring several sources into it (image or 3D nodes, a Moodboard, or a Collect’s All results); the items are then derived live from those connections.
- Remove an item by hovering it and clicking the x (for a wired item this disconnects that source).
- Wire the Batch output into one generation or derivation node. That node runs once per item, and every result lands in its history filmstrip. Add a Collect Results after it to fan all the results out to the next step.
- Test on one runs only the first item, so you can dial in settings before committing to the whole batch.
Supported on Generate Image, Edit Image, Style Reference, Remove Background, Image to 3D, Text to 3D (prompts), and Remesh, Texture, and Convert (3D). Not supported on Multi View to 3D, Multi View, or the AI (LLM) node.
For several variations of one prompt you do not need a Batch; use the model’s image count setting instead. Use a Batch when you have many distinct inputs. See Batch runs for how a batch runs and what it costs.
Viewer and output nodes
These display results. They are end points and do not generate.
Viewer
A free size viewer for an image, a 3D model, or text. Wire in any one of those and view it at whatever size you like. It passes its content through, so you can chain it.
Compare
An A versus B image comparison with a draggable wipe divider. Wire two images in and drag the slider to compare them. No output.
Organizational nodes
These help you annotate and structure the canvas. They have no handles.
Comment
A draggable sticky note for annotating the canvas. It can grow a pointer arrow that pins to a spot or anchors to a specific node and follows it.
Note
A simple sticky text note.
Section
The labeled frame that contains other nodes. See the sections part of The Canvas Editor.
Custom nodes
You can create your own reusable nodes:
- Pre Prompt - a fixed text prefix or suffix.
- Custom Image Edit - a locked model, style prompt, and default settings baked into one node, so you just wire an image and run.
- Group - a captured sub graph (several nodes and their wires) that you can stamp onto any canvas as a unit.
Custom nodes appear in the Add menu under their own section. Saving a selection as a group is one click from the selection toolbar.
Quick handle reference
A condensed table of what each main node takes and produces:
| Node | Inputs | Outputs |
|---|---|---|
| Prompt | none | text |
| Combine Prompts | up to 10 text | text |
| LLM | prompt, images | text |
| Generate Image | prompt | image |
| Edit Image / Style Reference | images or image set, prompt | image |
| Remove Background | image | image |
| Pose Changer / Optimize Image | one image | image |
| Image to 3D / Multi View to 3D / Text to 3D | image / views / text | mesh |
| Texture / Remesh / Convert | mesh (+ optional prompt or image) | mesh |
| Image | (source) | image |
| Images | none | per slot images |
| Moodboard | images | image set |
| Multi View | image | front, left, right, back |
| Render Views | mesh | image set and per view images |
| Combine to Grid | images or image set | image, layout |
| Split Grid | image, layout | image set and per cell images |
| Split into Parts | image | per part images, image set |
| Collect | one image or mesh | All results image set, out1…outN |
| Batch | images, prompts, or meshes | the same type, run once per item |
| Switch | several of one type | that type |
| Seed | none | number |
| Variable | none | text or number |
| Viewer | image, mesh, or text | passthrough |
| Compare | two images | none |
| 3D Model | (source) | mesh |
| File | result | none |
Frequently Asked Questions
What do the colors on the wires mean?
Each color is a data type. Red is text, blue is a single image, indigo is a group of images, green is a 3D mesh, amber is a number, violet is language model text, and cyan is a viewer passthrough. You can only connect two handles of the same color, which keeps pipelines valid.
Why does my generation node not have the input I expected?
Generation node inputs are derived from the model you select. Different models accept different inputs (some take an image set, some take individual image slots, some take only text). Switch the model in the node’s picker and the input handles update to match.
What is the difference between Multi View and Render Views?
Multi View takes a single image and uses AI to imagine four orthographic views of it (this costs credits). Render Views does the opposite: it takes an existing 3D model and renders turnaround images of it locally in your browser with no credits. Multi View feeds into 3D generation; Render Views extracts images from a finished model.
What is a Switch node for?
A Switch routes one of several inputs to its output, acting as a fork in your pipeline. In manual mode you pick the active branch; in auto mode the first input with content wins. When you run the flow, only the selected branch executes, so you can keep several alternatives wired up and choose between them without deleting anything.
How do I reuse a part of my pipeline in other flows?
Select the nodes you want to reuse, then click Save group in the selection toolbar. This captures them (and their wiring) as a custom group node. It then appears in your Add menu and can be stamped onto any canvas as a single unit.
What does bypassing a node do?
Bypassing (muting) a generation node makes it pass its input straight through to its output without running. The pipeline behaves as if the node were not there. It is the quick way to temporarily skip a step without unwiring it. Select the node and press B to toggle.