The Canvas Editor
Updated June 2026
The canvas editor is where you build pipelines. It is an infinite canvas you can pan and zoom around, with your nodes placed on it and wires connecting them. This page is a complete tour of the interface: the chrome around the edges, how to add and connect nodes, how to organize the canvas, and every keyboard shortcut.
The big picture
Everything floats over the canvas in clearly defined zones, so the controls never get in the way of your work:
- Top left tells you where you are: the flow name, a save status indicator, and a menu.
- Top center is the editing toolbar: tools that change the graph.
- Top right is the outcome cluster: the Run button, the AI assistant, and view toggles.
- Bottom left holds flow level actions like saving a template and version history.
- The center is the canvas itself.
You can hide all of this chrome with the Hide UI toggle if you want a clean, distraction free view, and bring it back the same way.
Top left: where am I
This corner is about orientation and safety.
- A sidebar toggle and back button to leave the flow.
- The flow name, which you can rename inline by clicking it.
- A File menu for actions like opening another flow, duplicating, or favoriting.
- A save status chip that shows a checkmark when saved, a spinner while saving, a dot when there are unsaved changes, and an amber warning if a save failed. You can click it to force a save.
Flow auto saves your work in the background as you go. You rarely need to think about saving. The status chip is there so you always know the current state, and you can press Ctrl+S (or Cmd+S) to save immediately at any time.
Top center: the editing toolbar
This toolbar holds only the tools that change your graph, left to right:
| Tool | What it does |
|---|---|
| Add | Opens the full categorized menu of nodes you can add. |
| Undo | Reverses your last change. |
| Redo | Reapplies a change you undid. |
| Drag / Select mode | Switches between panning the canvas and rubber band selecting nodes. |
| Auto arrange | Tidies up the layout, either of a selected section or the whole canvas. |
| Resolution toggle | Switches image previews between fast (lightweight) and sharp (full resolution). |
Drag mode versus Select mode
This is an important distinction:
- In Drag mode (the default), dragging the canvas with the left mouse button pans the view. To select nodes, click them or drag with the right or middle mouse button.
- In Select mode, dragging with the left button draws a selection box (a “rubber band”) around nodes. Panning moves to the right or middle mouse button.
Press S to toggle Select mode and Esc to return to Drag mode. After you finish a rubber band selection, Flow automatically switches back to Drag mode so you can immediately move the group you just selected.
Top right: outcomes and views
This cluster is about results and how you look at them:
- Run - the primary button that runs your flow. It has three states: an idle “Run” with a play icon, a live progress display with an inline Stop while running, and a selected state when the run panel is open. See Running Flows.
- AI Assistant (Bob) - opens the assistant chat. See AI Assistant.
- Focus - frames your whole flow neatly in view (also the
Fkey). - Outputs - opens a drawer listing everything this flow has ever generated.
- Theme and Sound toggles.
- Credits - your current credit balance.
- Hide UI - hides all the chrome for a clean view.
Bottom left: flow level actions
These actions apply to the whole flow rather than individual nodes:
- Save as template - turn the current flow into a reusable template.
- Give feedback - send feedback about the tool.
- Version history - browse and restore earlier saved versions.
- Share link - create a shareable link to the flow.
- Canvas settings.
Adding nodes (three ways)
There are three ways to add a node, each suited to a different moment.
1. The Add menu (browse everything)
Click Add in the toolbar, or right click anywhere on empty canvas, or press Space over empty canvas. This opens a categorized menu with every node, grouped into Text, LLM, Image, 3D (Mesh), Viewers, Logic, Workflows, and Notes. It also lists your custom nodes and any built in starter sub graphs. Use this when you want to browse what is available.
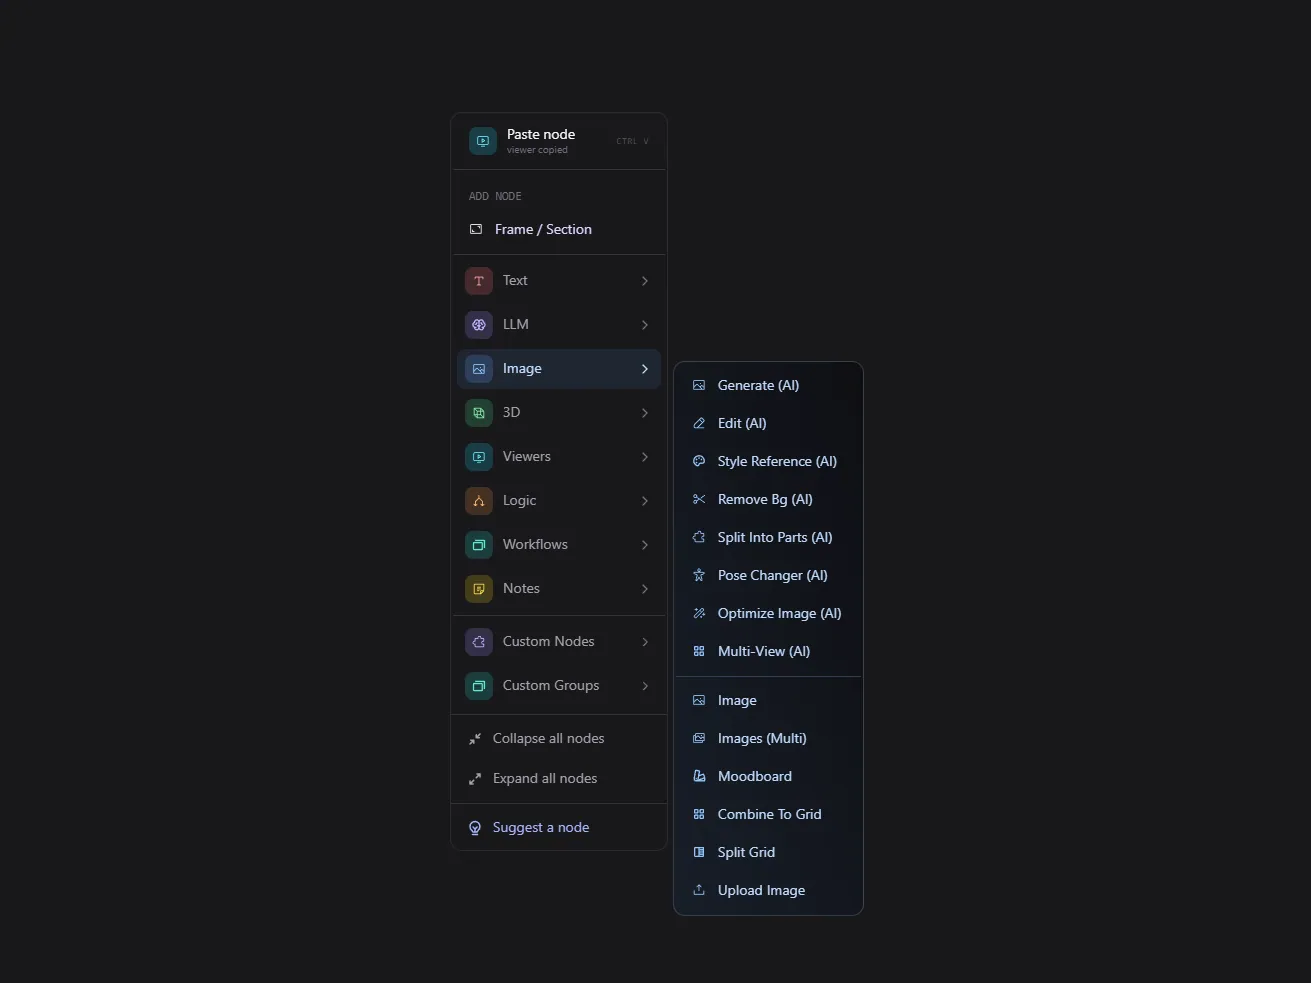
The Add node menu, with nodes grouped by category.
2. Quick Add (fast search)
Double click empty canvas, or press the / key, to open a small searchable palette right at your cursor. Type a few letters to filter, use the arrow keys to move, and press Enter to add. This is the fastest way to drop a node when you know its name.
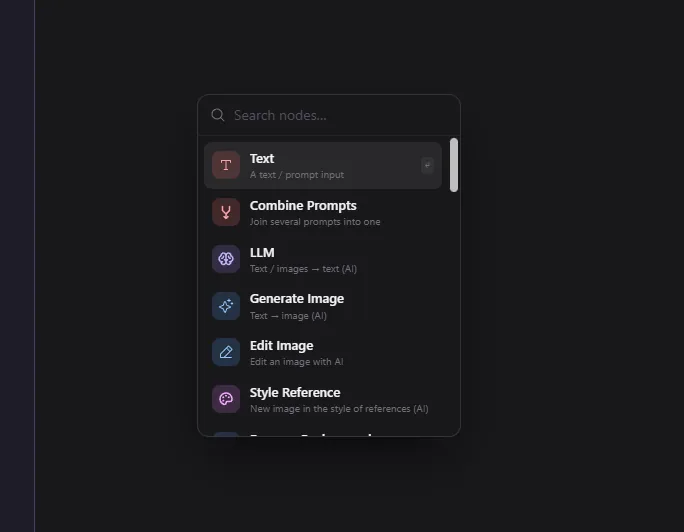
Quick Add: press the slash key and type to find any node fast.
3. Drag from a handle (add and connect at once)
Grab an output handle on an existing node and drag the wire out into empty space. When you release, Quick Add opens already filtered to only the nodes that can accept that kind of data, and the new node is wired up automatically. This is the smoothest way to extend a pipeline.
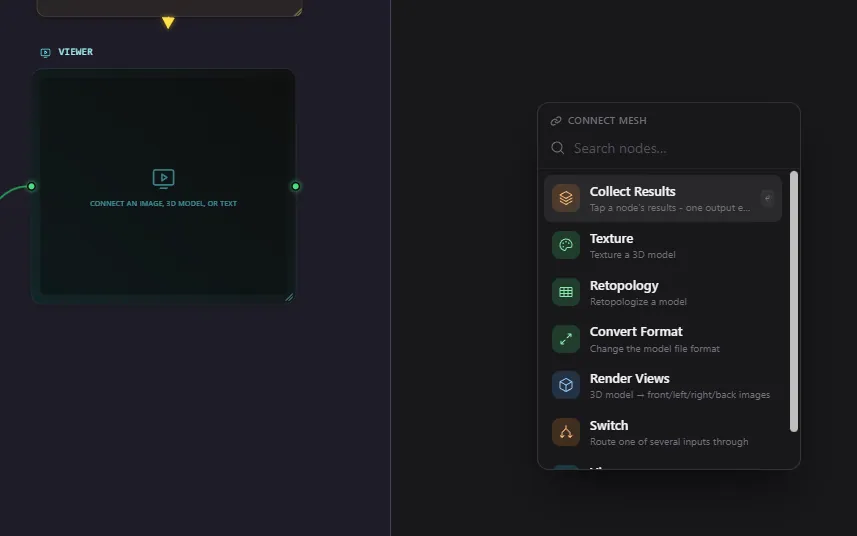
Drag a wire out from an output handle and release on empty canvas to add a compatible, pre wired node.
There is also a Node Library (opened from the AI assistant) that acts as a reference catalog. It shows each node’s inputs and outputs, when to use it, gotchas, and the models it offers with their credit costs.
You can also drag and drop files straight onto the canvas. Drop an image to create an Image node, a 3D file to create a 3D Model node, and so on. And you can paste an image from your clipboard with Ctrl+V.
Connecting nodes with wires
To connect two nodes, drag from an output handle (right side, source) to an input handle (left side, target). A few rules and conveniences:
- Types must match. A blue image output only connects to a blue image input. This prevents broken pipelines.
- Hollow versus filled dots. An input that is optional and not yet connected shows as a hollow ring. Required or connected inputs are filled in.
- Single versus multiple inputs. Some inputs accept only one wire (connecting a new one replaces the old). Others accept several, shown by progressively revealing more input slots as you connect.
- Click a connected dot to disconnect it. You can also hover the middle of a wire and click the small “x” to remove it.
- Wires are color coded by data type and animate when data flows during a run.
See the Nodes Reference for the full list of data types and how each node’s handles work.
Organizing the canvas with sections
A section (also called a frame) is a labeled box you can put nodes inside, similar to a frame in a design tool. Sections are the only nodes that can contain other nodes.
- Create a section from a selection: select two or more nodes, then click “Create section” in the selection toolbar that appears above them. Flow draws a frame around them with a nice morph animation.
- Move nodes in and out: drag a node onto a section to put it inside; drag it out to remove it. Dragging the section itself moves everything inside it together.
- Rename and recolor sections from their label bar.
- Deleting a section keeps its children. Removing a frame detaches the nodes inside rather than deleting them, so you never lose work by accident.
Sections are the main tool for keeping a large pipeline readable.
Selecting nodes
- Click a node to select it. Shift click or rubber band (in Select mode) to select several.
- When two or more nodes are selected, a small selection toolbar floats above them with quick actions: Create section, Save group (capture them as a reusable custom node), Clear outputs, Tag (apply a color tag), and Delete.
- Color tags let you mark related nodes. A filter bar at the bottom lets you click a tag to highlight only nodes with that tag and dim the rest.
The floating panels
Four large panels can dock to the edges of the screen or be torn off to float freely:
- AI Assistant - the Bob chat.
- Outputs - the gallery of everything this flow generated.
- Run - the run panel with inputs and the queue.
- Content Viewer - a live preview that mirrors whatever node you have selected, shown larger.
Drag a panel’s header to move it. Drag it near an edge to dock it; drag it away to float it. Each panel remembers its size and position per flow. You can have only one panel docked to each edge at a time.
Navigation and viewing
- Pan: drag the canvas (in Drag mode) or use the right or middle mouse button.
- Zoom: scroll wheel. Flow lets you zoom far out to see a huge pipeline at a glance.
- Focus your flow: press
For click the Focus button to frame everything neatly. - Fly to a node: double click a node to zoom the camera to fit it.
- Level of detail: when you zoom far out, heavy node interiors stop rendering to keep things smooth. Zoom back in and they return.
- Preview quality: the resolution toggle in the toolbar switches images between a fast lightweight thumbnail and the full sharp asset. Wires, downloads, and large viewers always use the full asset regardless of this setting.
Keyboard shortcuts
These work when the canvas has focus (not while typing in a text field).
| Shortcut | Action |
|---|---|
Space (over empty canvas) | Open the Add node menu at the cursor |
/ | Open Quick Add at the cursor |
| Double click empty canvas | Open Quick Add |
Ctrl+Z / Cmd+Z | Undo |
Ctrl+Shift+Z / Ctrl+Y | Redo |
Ctrl+S / Cmd+S | Save now |
Ctrl+C / Ctrl+V | Copy / paste selected nodes |
S | Toggle Select mode |
Esc | Return to Drag mode |
F | Focus and frame the whole flow |
Delete / Backspace | Delete selected nodes or wires |
| Double click a node | Fly the camera to that node |
Quick add shortcuts for common nodes (press over empty canvas):
| Key | Adds |
|---|---|
T | Prompt (text) node |
L | LLM node |
G | Generate Image node |
E | Edit Image node |
3 | Image to 3D node |
C | Combine Prompts (or collapse selected nodes if any are selected) |
B | Bypass (mute) selected generation nodes |
Frequently Asked Questions
How do I add a node in Flow?
There are three ways. Click the Add button in the toolbar (or right click empty canvas, or press Space) to browse the full categorized menu. Press the slash key or double click empty canvas to open a quick search palette. Or drag a wire out from a node’s output handle into empty space to add a connected node automatically.
Why will my nodes not connect?
Flow only lets you connect handles of the same data type. A blue image output cannot connect to a red text input, for example. Check that the output and input are the same color. Optional inputs that are not yet connected appear as hollow rings; required ones are filled dots.
How do I save my work in Flow?
Flow auto saves in the background as you work, so you usually do not need to do anything. The save status chip in the top left shows the current state. To save immediately, press Ctrl+S or Cmd+S, or click the chip.
What is a section and how do I make one?
A section is a labeled frame that groups nodes together, like a frame in a design tool. Select two or more nodes, then click Create section in the toolbar that appears above the selection. Dragging the section moves everything inside it. Deleting a section keeps the nodes inside, it only removes the frame.
How do I pan and zoom the canvas?
In the default Drag mode, drag with the left mouse button to pan and use the scroll wheel to zoom. Press F to frame your whole flow neatly. Double click a node to fly the camera to it. Switch to Select mode (press S) when you want left drag to draw a selection box instead.
Can I copy nodes from one part of the canvas to another?
Yes. Select the nodes and press Ctrl+C to copy, then Ctrl+V to paste. The pasted nodes keep the wiring between them. You can also duplicate a single node from its header menu.