AI Painting
How to repaint a 3D model with AI in the Texture Painter: writing prompts, choosing a model and quality, what the AI sees, all-sides (360°) generation, reference images, revealing AI layers, upscaling and credits.
AI painting turns a short description into a new texture on your model. You frame the side you want to change, describe the change, and the AI repaints what it sees. The result comes back as an AI layer that you reveal exactly where you want it. This page covers prompts, models, credits, what the AI sees, all-sides generation, revealing and upscaling.
AI painting needs a paid plan and uses credits. Each model shows its cost in the app, and the Generate button shows exactly what the next generation costs. On the free plan the button reads Upgrade to generate.
Generate an AI layer
Frame the side you want to change
The AI repaints the view inside the corner marks labelled What the AI sees. Turn and zoom the model so the area you want to change fills that square. A straight front or side view gives the cleanest result: hold Alt + Shift while you drag to snap to one.
Describe the change
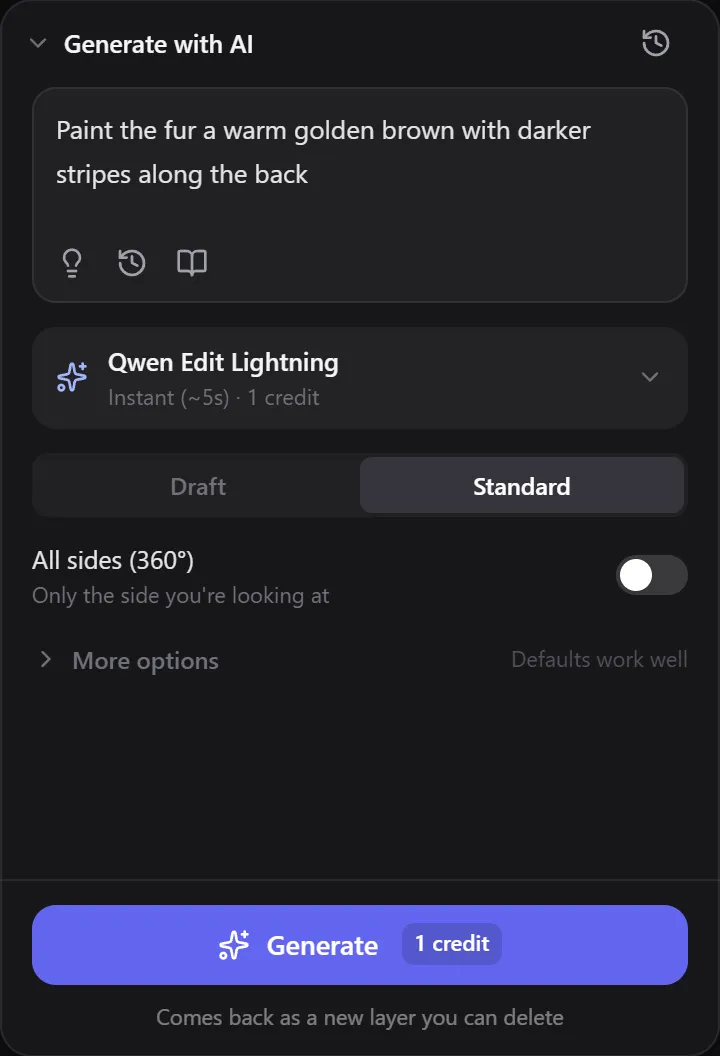
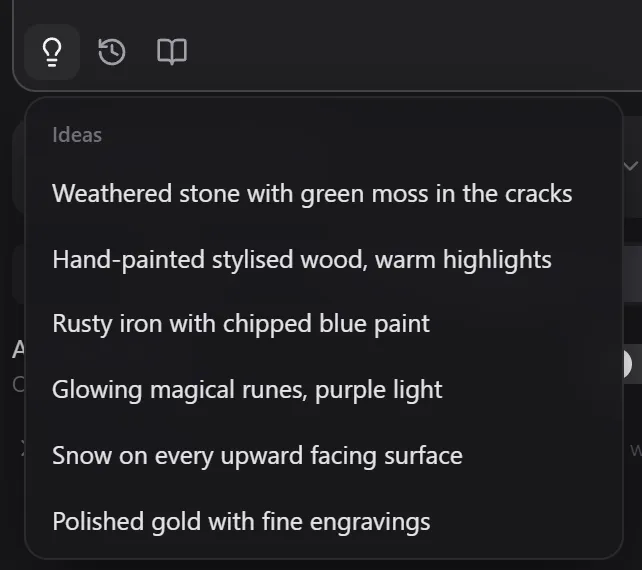
Type it in the prompt box of Generate with AI. Up to 1,000 characters. The lightbulb (Ideas) offers prompts that work well, the clock (Recent prompts) brings back prompts you used, and the book (Prompt library) opens your saved prompts and templates.
Pick a model and quality
Click the model card to choose a model (see the table below). Below it, pick the quality. The cost on the Generate button updates as you choose.
Generate
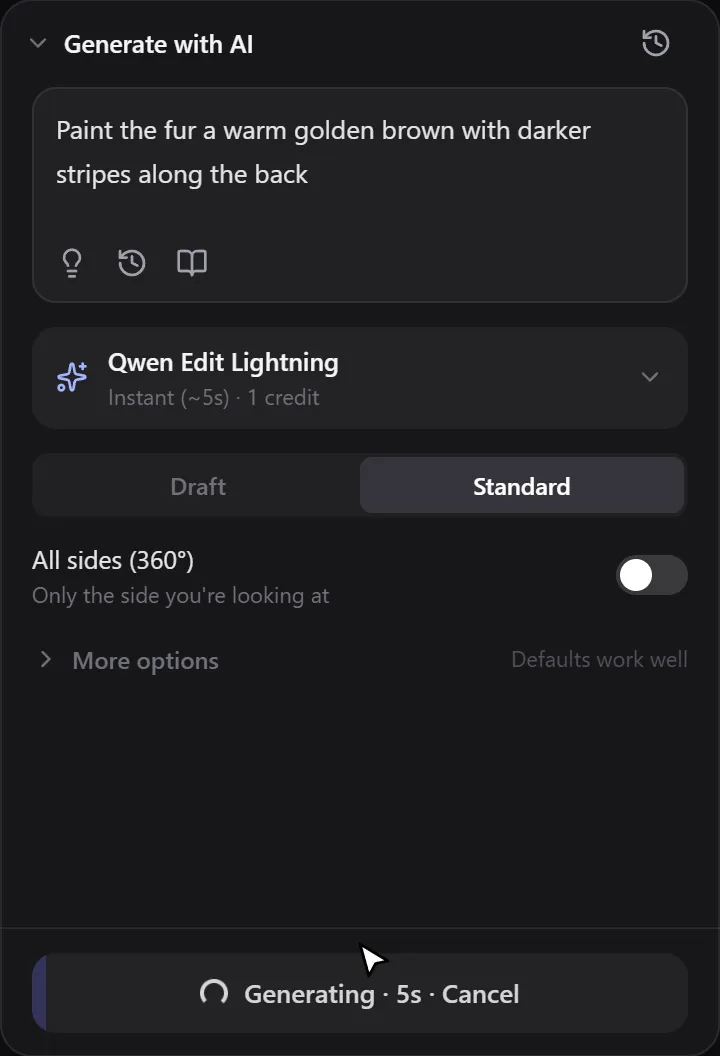
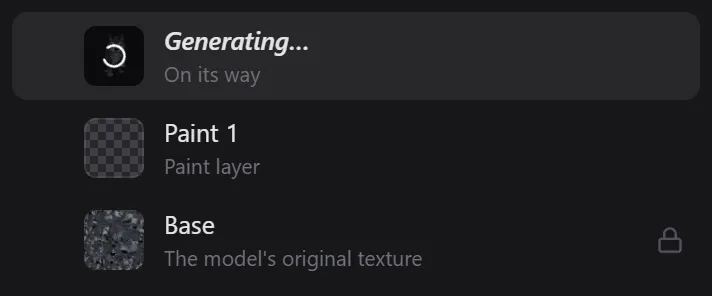
Click Generate or press Ctrl+Enter (Cmd+Enter on a Mac). The button shows the step the generation is on, such as AI is painting with the time left, then Sharpening the result or Projecting onto the model. A new layer appears at the top of the list with Generating… and the same step. You can keep working while it runs.
With All sides (360°), each view gets its own layer. It says Waiting its turn until it is projected onto the model, and the button counts the views, for example Projecting the views · 2 of 4.
Write prompts that work
Describe the surface: colours, materials and finishes. The AI keeps the model's shape and your camera angle, so you don't need to describe them.
- Be specific about colour: matte black, pearl white, warm golden brown.
- Name the material: brushed steel, aged leather, polished marble, weathered stone.
- Add the finish: glossy, matte, metallic, chipped paint.
- Say what to keep when you only change a part: keep everything else the same.
- Avoid layout changes such as moving, adding or removing parts. The AI paints surfaces; it can't change the shape.
| Goal | Example prompt |
|---|---|
| Change the colours | Paint the fur a warm golden brown with darker stripes along the back |
| Change the material | Rusty iron with chipped blue paint |
| Add details | Add glowing blue runes on the forehead and cheeks, keep everything else the same |
| Add wear | Add dirt and scratches on the paws and legs, keep the colours |
| Change the style | Hand-painted stylised wood, warm highlights |
Choose a model
Click the model card (Change) to open the picker. Models are grouped by what they do; type in the search box to find one, and click a model to pick it. Each model shows its typical time, its cost range and whether it reads reference images. Qwen Edit Lightning is the default (Start here): results in seconds for 1 credit, great for trying ideas.
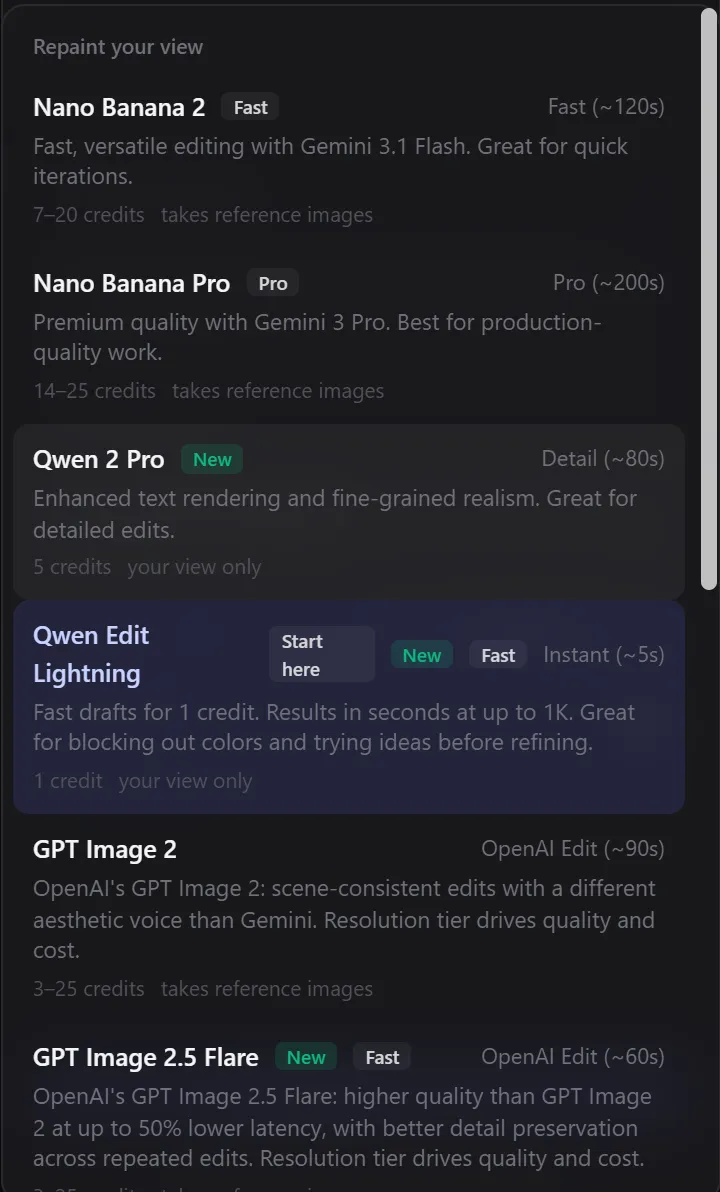
Repaint your view (the main models):
| Model | Typical time | Credits shown in the app | Reference images |
|---|---|---|---|
| Qwen Edit Lightning | Instant (~5s) | 1 | No |
| Nano Banana 2 | Fast (~120s) | 7 to 20 | Yes |
| Nano Banana Pro | Pro (~200s) | 14 to 25 | Yes |
| Qwen 2 Pro | Detail (~80s) | 5 | No |
| GPT Image 2 | ~90s | 3 to 25 | Yes |
| GPT Image 2.5 Flare | ~60s | 3 to 25 | Yes |
| GPT Image 2.5 Sunburst | ~120s | 3 to 25 | Yes |
Clean up: Topaz Refine (1 credit) refines your existing texture and stays close to the original.
Classic: Original Texture AI, Fast Texture AI, Creative Texture AI and Texture AI Remove BG (4 credits each), the presets from earlier versions. They add Creativity and Resemblance sliders under More options.
Quality
Below the model card you pick the quality. The options depend on the model:
| Quality | Output size |
|---|---|
| Draft | 0.5K |
| Standard | 1K |
| High | 2K |
| Ultra | 4K |
Higher quality costs more. For example, the GPT Image models cost 3 credits at Standard, 14 at High and 25 at Ultra. Hover a quality to see its cost.
Start cheap, finish sharp. Try your prompt with Qwen Edit Lightning first. When the idea works, generate the final version with a sharper model or a higher quality.
What the AI sees
The AI receives the square inside the corner marks in the 3D view, as it looks in your current shading. To check it before you spend credits:
- Switch the 2D view to What the AI sees. It follows the model as you turn it and updates by itself when you paint or change anything that affects the picture. With All sides (360°) on, it shows every angle at once and the corner marks in the 3D view go away.
- Or use Export › Screenshot (Preview what the AI sees).
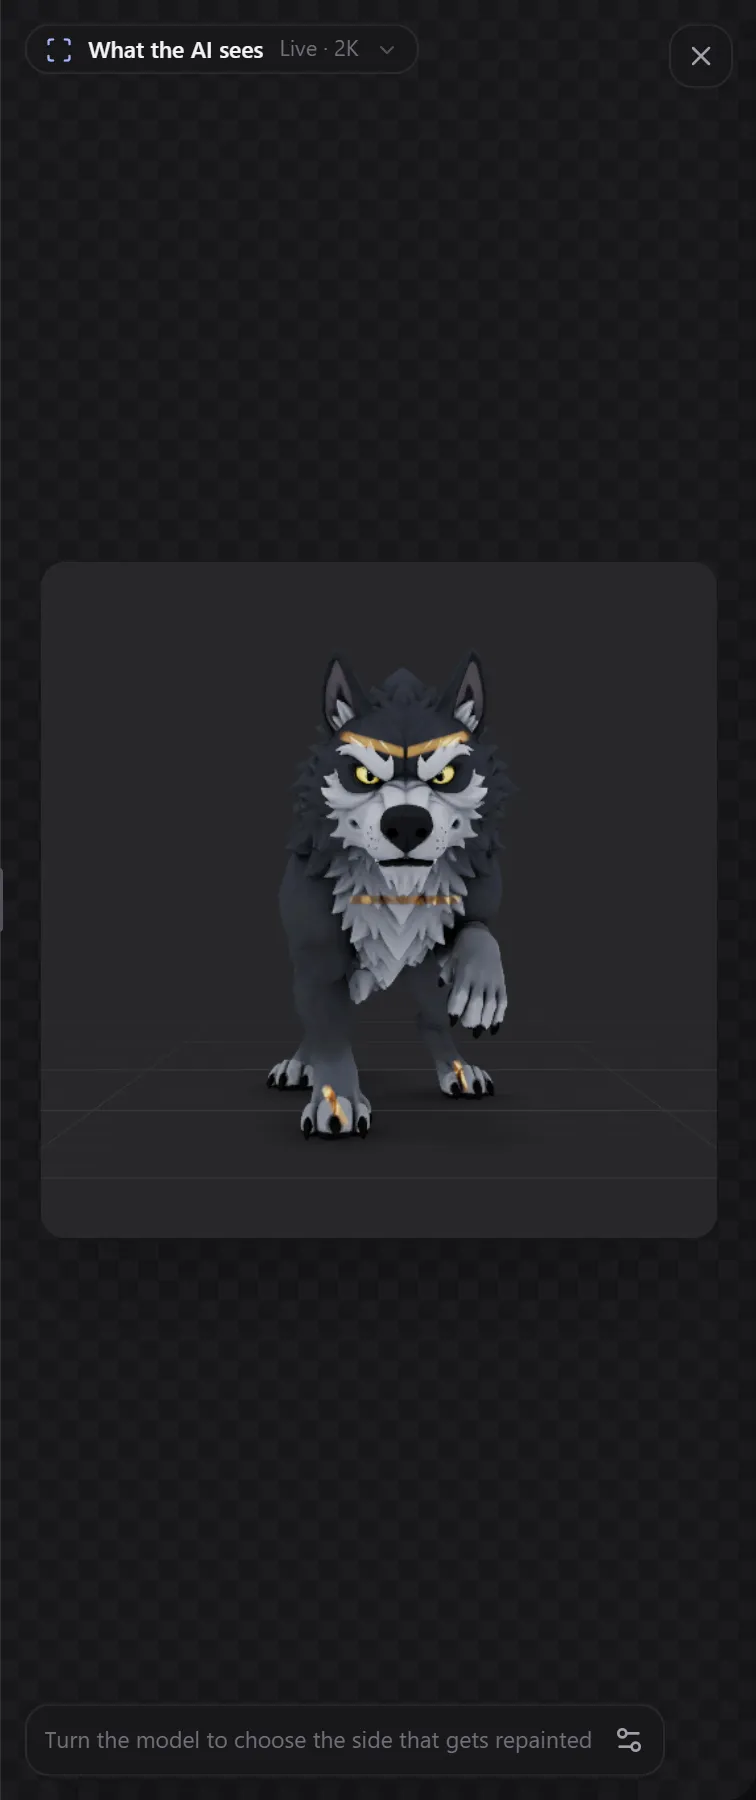
Turn off AI capture frame in the view bar if the corner marks get in your way while painting.
All sides at once (360°)
A normal generation repaints only the side you are looking at. Turn on All sides (360°) to repaint the model from several angles in one go, so front, back and sides match.
| Option | Choices | What it does |
|---|---|---|
| Angles | 4 angles (front, back, left and right), 9 angles (also the four corners, plus one from above or below) | How many angles are painted. 4 is enough for most models. |
| Also from (9 angles only) | Above, Below | Where the 9th angle looks from: above for heads and roofs, below for soles and undersides |
| Sharpen the result | On / off (+2 credits) | Gives a cleaner, sharper texture all around |
| Front of the model | Use my current view as the front, Reset | Only needed if the model faces sideways or backwards: turn it so its front faces you, then click |
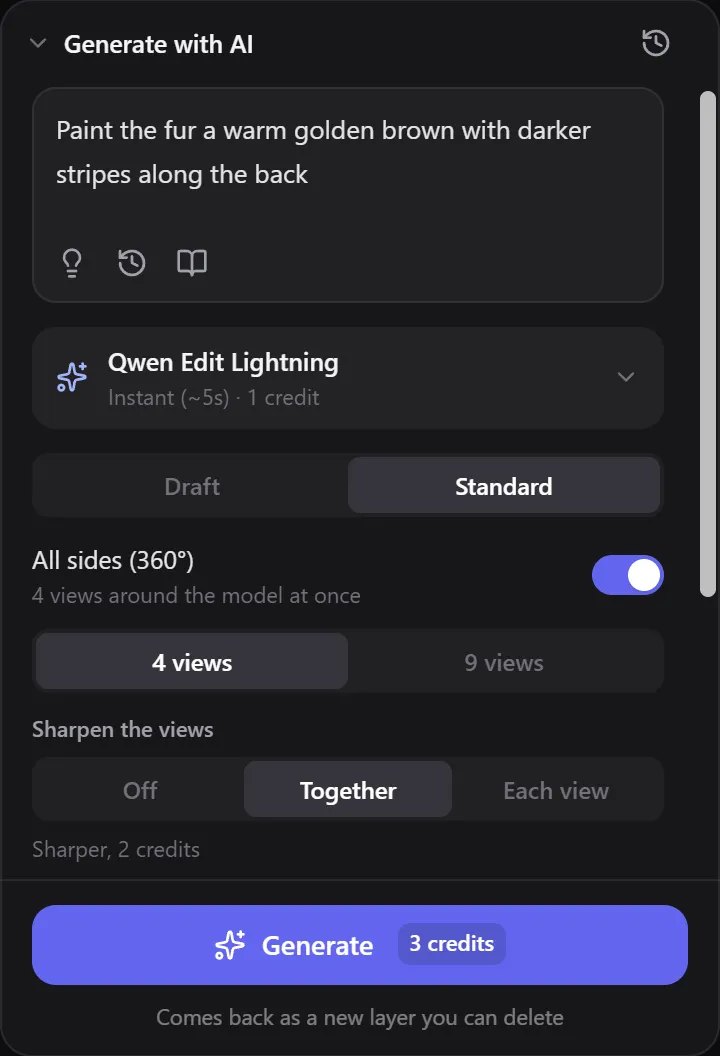
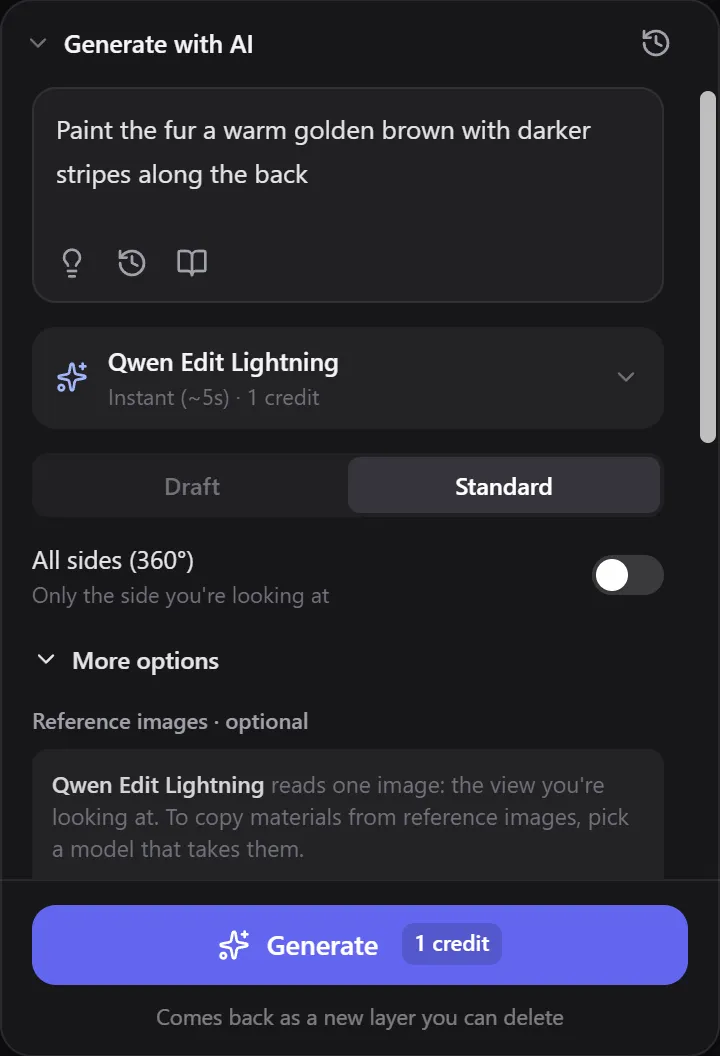
Use all sides for overall changes such as a new material or colour scheme. For a detail on one side, a normal generation is faster, cheaper and more precise. All sides is not available while reference images are used.
More options
More options at the bottom of the panel holds settings most people never need. The defaults work well. They come in three groups.
| Group | Option | What it does |
|---|---|---|
| Copy a look from images | Reference images | Up to 3 images whose materials and colours the AI copies. Only models that take reference images use them. Marked as experimental. |
| What the AI may change | Keep the shape and angle | On by default: only materials and colours change. Off: the AI may also change the shape. |
| Start from the original texture | Off by default. The AI works from the model's own texture and ignores your paint. | |
| What the AI sees | Picture size | 1K, 2K (default) or 4K: how detailed the picture of your model is that the AI works from. |
| Background | Dark, White or Green behind the model in that picture. Pick one that stands out from the model's colours. | |
| Show the floor grid | Includes the floor under the model in the picture. | |
| Name the angles (360° only) | Writes front, back, left and so on onto each angle, so the AI keeps them apart. | |
| Preview the picture / How shading matters | Shows the exact picture the AI will get, and how the shading mode changes it. |
What happens after a generation
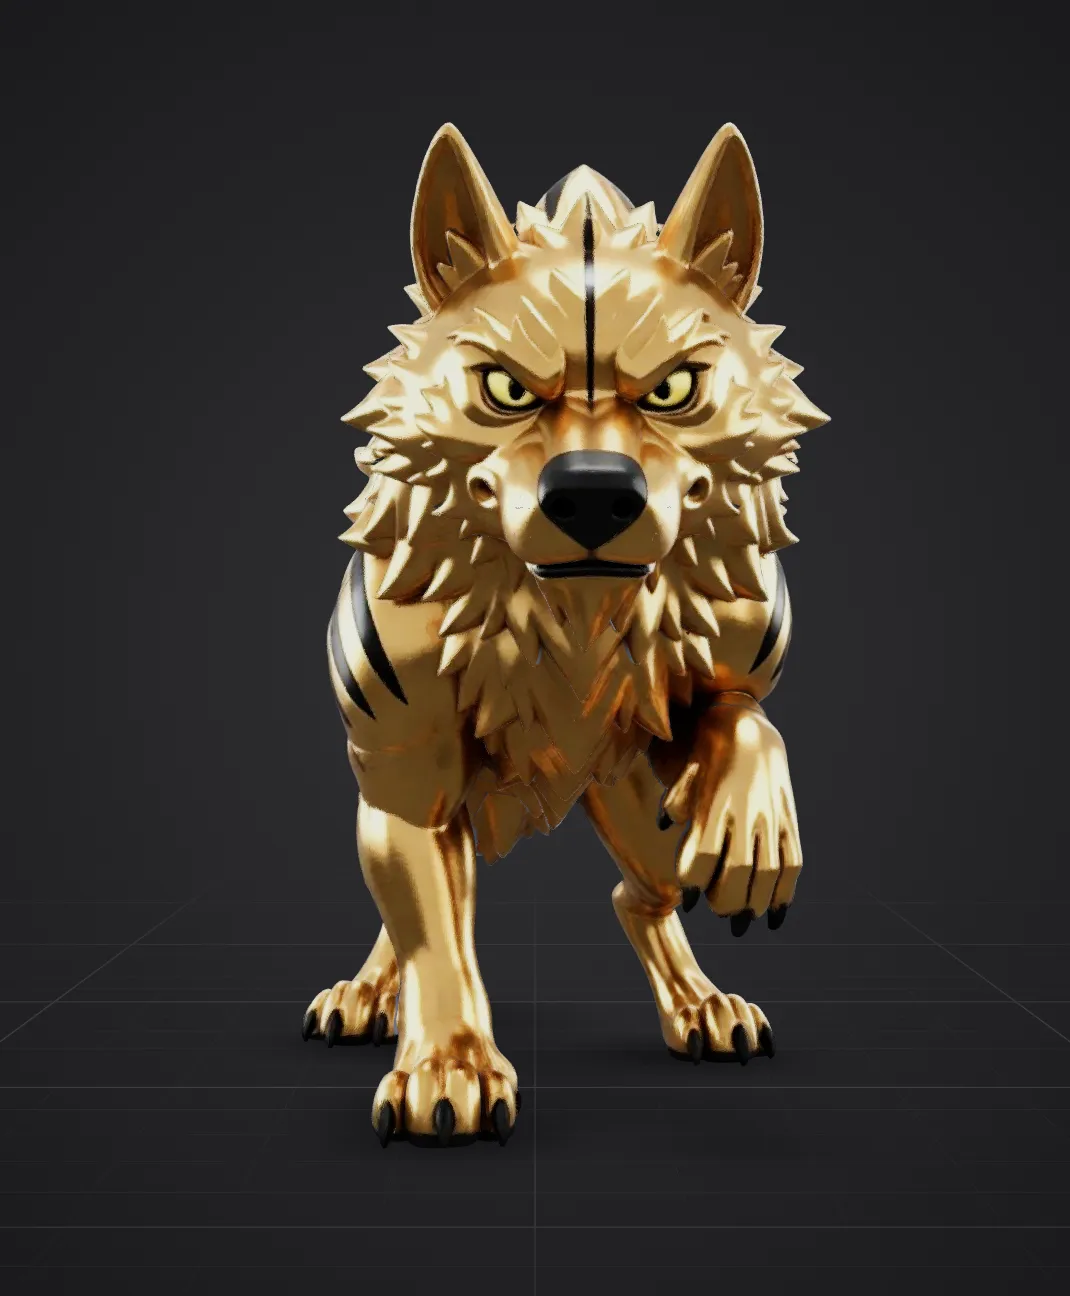
The result arrives as a new layer named Projection 1 (then Projection 2, and so on), marked AI layer. It is placed on top of the layer list and starts hidden: the model doesn't change yet. The 2D view shows the result on the model so you can judge it.
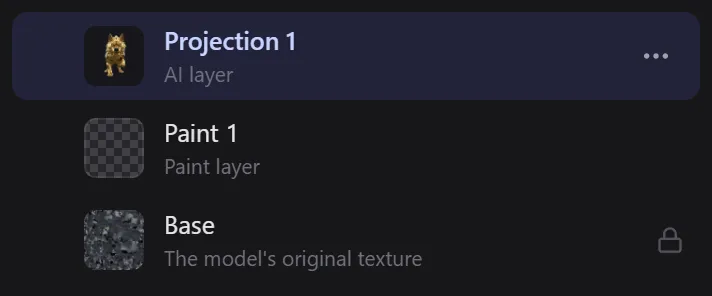
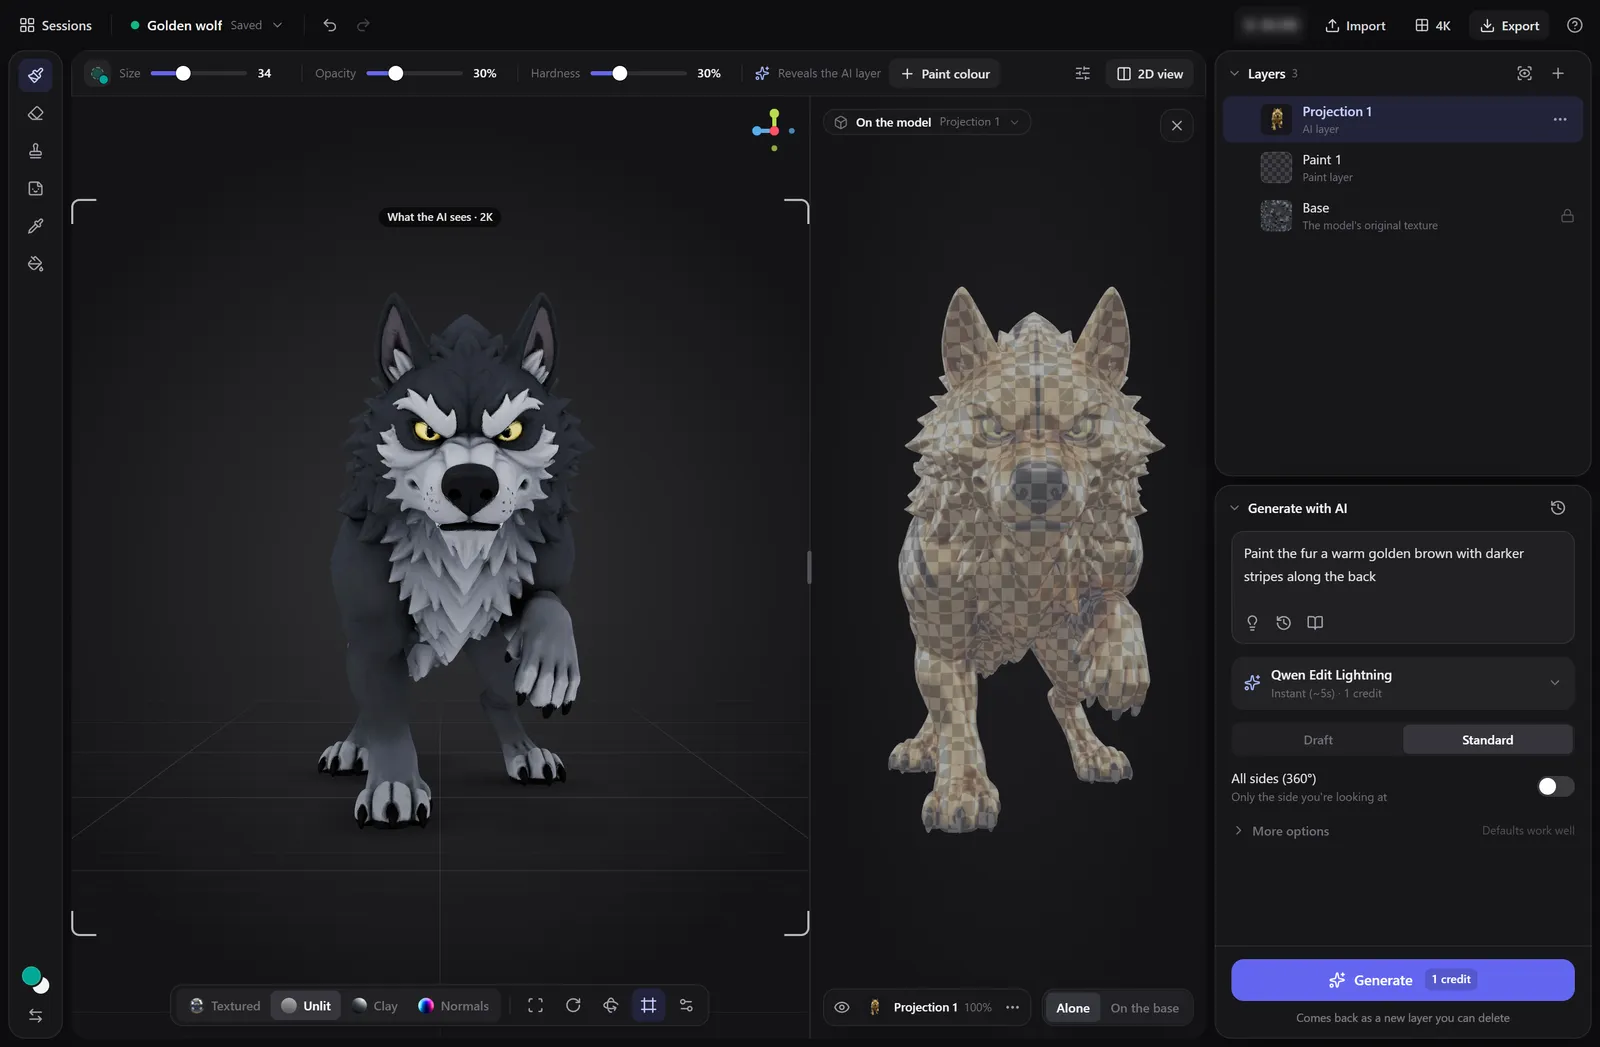
Why hidden? AI results are rarely perfect everywhere. Starting hidden means you only bring in the parts that look good, and everything else stays as it was.
Reveal or hide an AI layer
With the AI layer selected, the options bar says Reveals the AI layer:
- The brush reveals the AI texture wherever you paint. Your brush colour isn't used on AI layers.
- The eraser hides it again.
- Opacity and Hardness work as usual: soft, low-opacity strokes blend the result in gently.
- Paint colour adds a normal paint layer if you want to paint with your colour instead.

Reveal everything with smooth edges
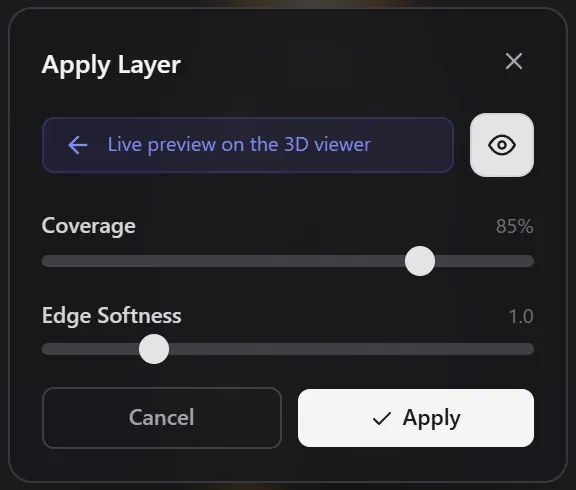
Open the AI layer's ⋯ menu and choose Apply with smooth edges. A small Apply Layer panel opens over the 2D view, and the 3D view shows a live preview:
- Coverage (30 to 100%, default 85%): how far the result reaches toward the edges of what the AI saw.
- Edge Softness (0.2 to 4.0, default 1.0): how softly it fades out at those edges.
- The eye button compares with and without the result.
Click Apply to reveal the layer, or Cancel.
Upscale an AI layer
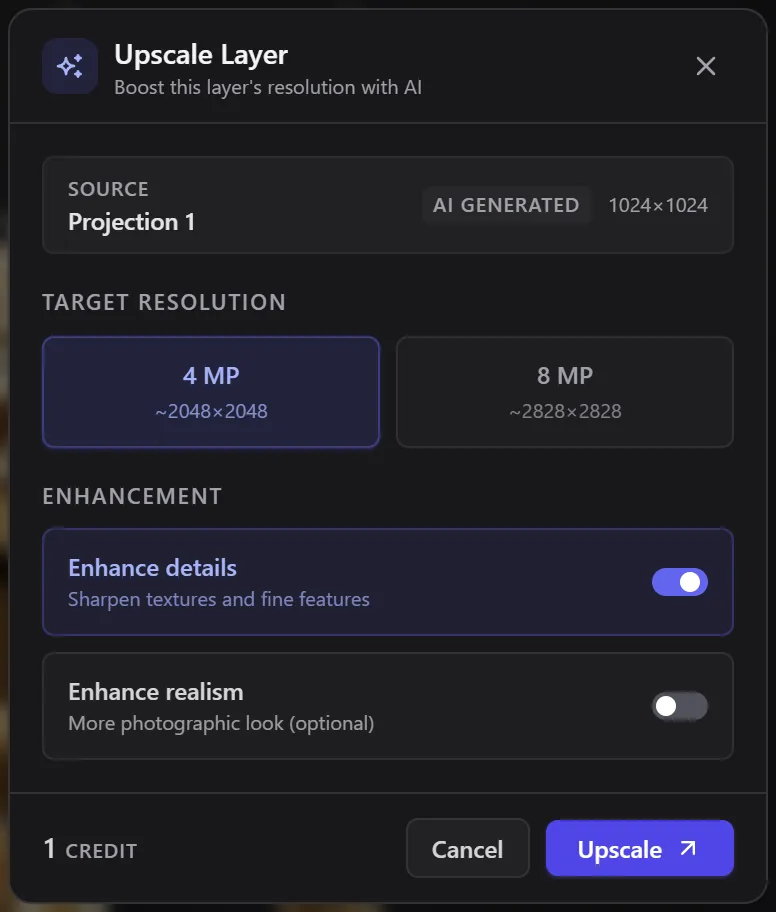
For a sharper copy of an AI layer, open its ⋯ menu and choose Upscale. The Upscale Layer dialog offers 4 MP (about 2048 × 2048, 1 credit) or 8 MP (about 2828 × 2828, 2 credits), with Enhance details and Enhance realism. The sharper version arrives as a new layer marked AI · upscaled.
Retry, cancel and history
- Not happy? Change the prompt, model or view and generate again. Each result is its own layer, so you can compare and delete the ones you don't need.
- Cancel a running generation by clicking the Generate button (it reads Cancel while running), the thumbnail of the layer that is on its way, or Cancel in the 2D view.
- The clock icon at the top of Generate with AI lists the AI layers in this session and the prompts you used. Click one to select it again.
Worked example: hand-painted eyes, then an AI weathering pass
This combines both ways of painting, and shows why layer order matters.
- Paint the eyes by hand. Add a Paint layer and name it Eyes. Point at an eye, press
Fand zoom in. Pick a bright colour, make the brush small with[, raise Hardness and paint the iris. Turn the model and do the other eye. - Frame the body. Press
Shift+F, then snap to a front view withAlt+Shift+ drag. - Generate a weathering pass. Prompt: Add dirt and scratches on the paws and legs, keep the colours. Start with Qwen Edit Lightning.
- Reveal only where you want wear. Select the new AI layer and paint over the paws and legs. Leave the face alone.
- Keep your eyes on top. Drag the Eyes layer above the AI layer, so the AI result never covers your hand-painted detail.
Credits and errors
- The Generate button always shows the cost of the next generation. Each model's cost range is in the picker.
- AI stickers (decals) cost 5 credits; upscaling costs 1 or 2 credits.
- If a generation fails, for example because you are out of credits, an error message explains why, no layer is added, and the 2D view shows what happened. Click the credit balance in the top bar to get more credits.
Related
- Layers: masks, order and merging.
- The 2D view: check results and what the AI sees.
- Tips and troubleshooting
Frequently Asked Questions
New AI layers start hidden so you decide where the result shows. Paint over the model with the AI layer selected, or choose Apply with smooth edges in its layer menu.
Qwen Edit Lightning, the default. It returns a result in seconds for 1 credit, so you can test prompts cheaply. Switch to a sharper model for the final version.
No. AI painting only changes the texture. Prompts that ask to add or move parts won't change the shape.
For changes that should look the same all around the model, such as a new material or colour scheme. For one detail on one side, a normal generation is cheaper and more precise.
Yes. Open More options and add up to 3 images under Reference images. The AI copies their materials and colours. Only models that take reference images use them.
Painting tools
Every painting tool in the Texture Painter: brush, eraser, image brush, decals, eyedropper and fill, plus colours and palettes, brush size, opacity and hardness, Paint hidden areas and Edge fade.
Layers
How layers work in the Texture Painter: layer types, adding, renaming, reordering, grouping, merging and deleting layers, visibility, lock, opacity, blend modes, masks on AI layers, colour adjustments, and undo.