Texture Painter
Updated May 2026
The Texture Painter is an in-browser workspace for painting directly on 3D models. It combines manual brushwork with AI-powered texture projections and a full layer system. Paint at up to 8K resolution and export with PBR materials.
This page covers V2, the current beta version.
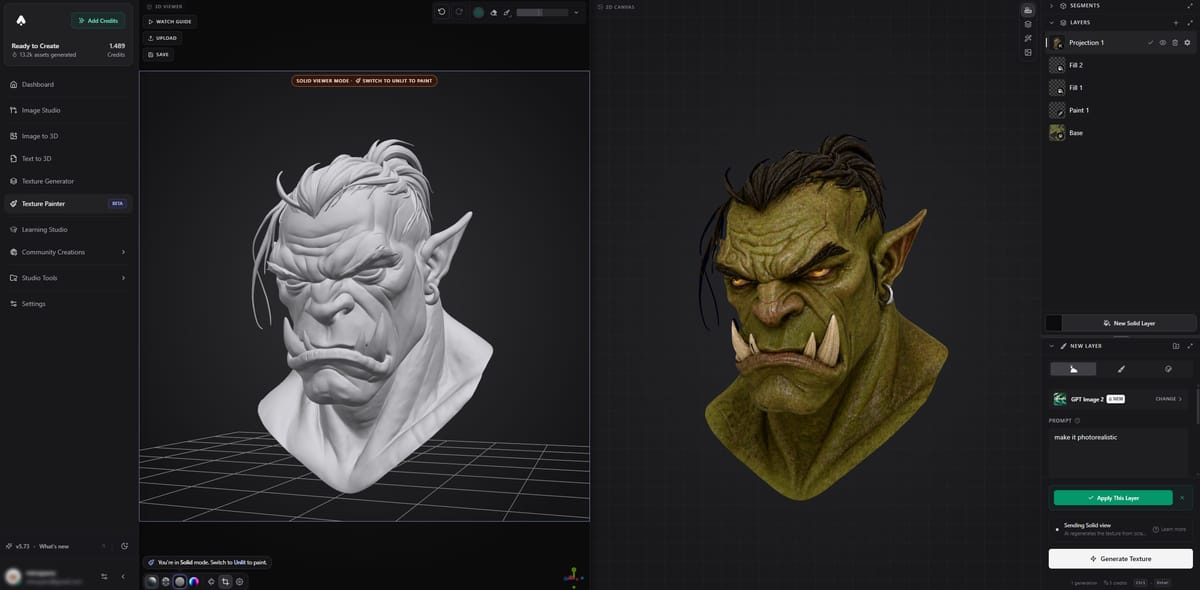
The Texture Painter workspace. Left: 3D painting viewport. Right: AI preview and generation panel.
Tools
| Tool | What it does |
|---|---|
| Color Brush | Freehand painting directly on the 3D surface |
| Bucket Fill | Flood-fill connected UV regions with a color |
| Eraser | Remove paint from any layer |
| Image Brush | Stamp images from the built-in library onto the surface |
| Eyedropper | Pick a color from anywhere on the model |
Layer Types
The Texture Painter uses a layer system similar to Photoshop. You can stack, reorder, and blend layers to build up complex textures.
- Paint layers - Manual brush painting. Each stroke goes onto the active paint layer.
- Project layers - AI-generated textures projected from a camera capture onto the model’s UV map.
- Decal layers - An AI-generated or uploaded image projected locally onto a specific area. Supports zoom and rotation controls for precise placement.
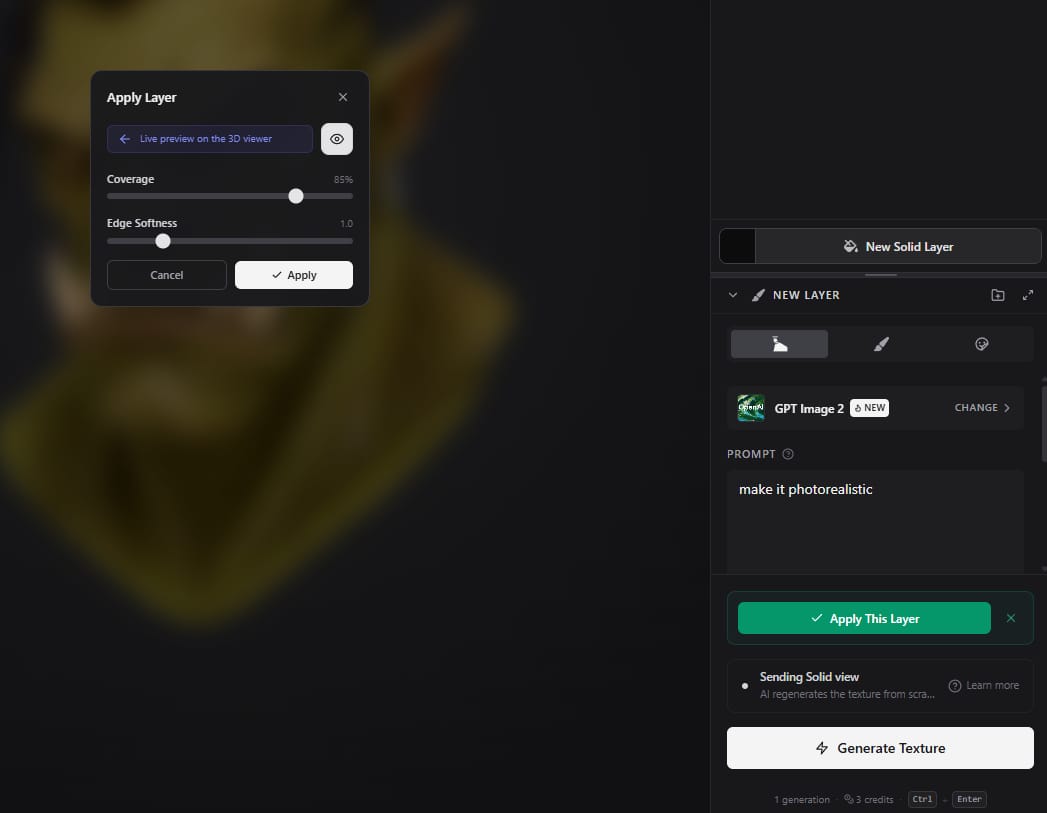
The Apply Layer dialog lets you adjust coverage and edge softness before projecting the AI-generated texture onto your model. On the right: the prompt input and AI model selector (GPT Image 2 shown).
AI Models for Projection
When creating a project layer or decal, you choose an AI model to generate the texture.
| Model | Credits | Best for |
|---|---|---|
| Nano Banana 2 | 4-12 | Flexible resolution, good default choice |
| Nano Banana Pro | 8-14 | Highest quality projections |
| GPT Image 2 Edit | 3-12 | Precise edits that respect existing content |
| Qwen 2 Pro | 5 | Alternative option, flat cost |
| ImageGen 4 (decals) | 4 | Generate decal images from a text prompt |
How AI Projection Works
AI projection is the core workflow for texturing a model quickly. Here is the process:
- Position your model in the 3D viewer at the angle you want to texture
- Capture the current camera view
- Write a prompt describing the texture you want (for example, “worn leather with brass buckles”)
- The AI generates a texture based on that view and your prompt
- The generated texture is projected back onto the model’s UV map
- Rotate the model to a new angle and repeat for full coverage
You build up texture coverage by projecting from multiple angles. Each projection becomes its own layer, so you can adjust opacity or erase sections that overlap poorly.
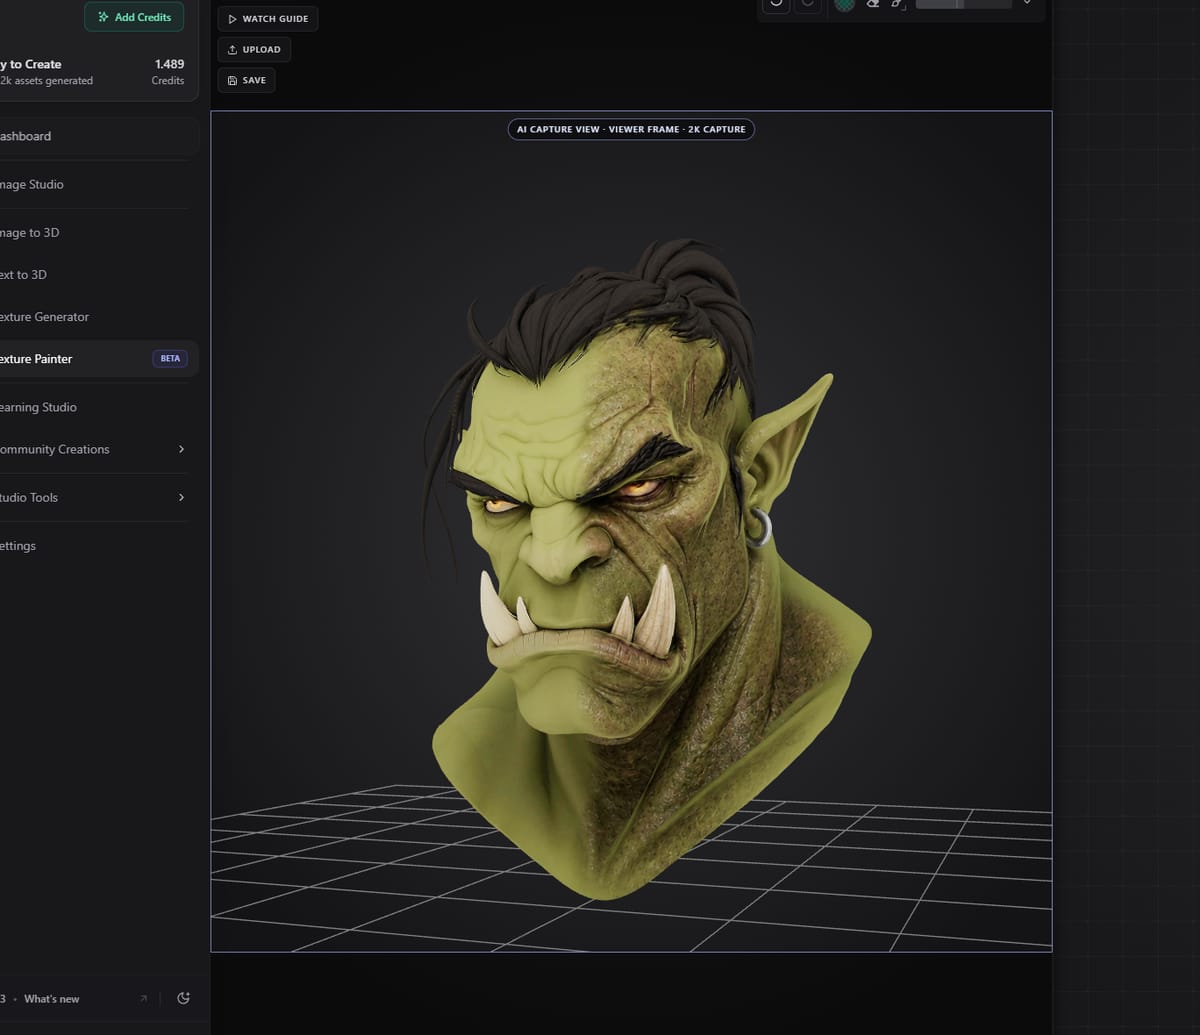
A model being textured with a combination of AI projection and manual brush painting.
Multiview Mode
Instead of manually capturing one angle at a time, multiview mode captures multiple angles automatically. This gives more consistent texturing across the full model surface since the AI sees the model from several directions at once.
Resolution
- Paint canvas: 1K to 8K resolution
- Export: Up to 12K
Higher resolution means more detail but slower performance. 4K is a good balance for most projects.
Export Options
- GLB - Standard textured model
- GLB with PBR materials - Includes roughness, metalness, and normal maps
- Optimized GLB - Compressed for web and real-time use
- Screenshots - Export the current viewport as an image
Keyboard Shortcuts
| Shortcut | Action |
|---|---|
| Ctrl+Z | Undo |
| Ctrl+Y | Redo |
| Z | Cycle view modes (textured / solid / unlit / normals) |
| B | Toggle sidebar |
Tips
Start with AI projection to lay down base textures, then switch to manual painting for refinement and detail work.
- Use the “Preserve composition” toggle when you want to add details without changing existing textures
- Work at 4K resolution for a good balance of quality and performance
- Export with PBR materials if your target supports it (Unity, Unreal, Blender)
- Use decal layers for logos, labels, and small detail patches that need precise placement
- The eraser works per-layer, so you can clean up projection overlap without affecting other layers
Related Tools
- Need a model first? Generate one with Image to 3D or Text to 3D
- Want AI-generated textures instead of painting? Use the Texture Generator
- Need clean UVs before painting? Run UV Unfold first
- Need to reduce poly count before texturing? Use the Remesh Tool
- Importing the painted model into a game engine? Check Integrations for format tips
Frequently Asked Questions
Can I paint textures on a 3D model without downloading software?
Yes. The Texture Painter in 3D AI Studio runs entirely in your browser. There is nothing to install. You get brush tools, layers, AI projection, and up to 8K resolution, all from a web interface that works on any modern computer.
How is this different from Substance Painter?
The 3D AI Studio Texture Painter is browser-based and combines manual painting with AI-generated texture projections. You do not need a license or local install. It is simpler for quick texturing jobs, though Substance Painter still offers more advanced features like particle brushes and channel painting for AAA production pipelines.
How does AI texture projection work?
You position your model at an angle, capture the view, and write a prompt describing what you want. The AI in 3D AI Studio generates a texture for that viewpoint and projects it onto the model’s UV map. You repeat from different angles to build up full coverage. Each projection becomes a separate layer you can adjust or erase.
What resolution can I paint at?
The painting canvas in 3D AI Studio supports 1K up to 8K resolution, and exports go up to 12K. For most projects, 4K gives a good balance between detail and browser performance. Higher resolutions work best on machines with dedicated GPUs.
How many credits does texture painting cost?
The manual brush tools are free to use. AI projection costs vary by model: Nano Banana 2 uses 4 to 12 credits, GPT Image 2 Edit uses 3 to 12, and Nano Banana Pro uses 8 to 14. Each projection is one credit charge, so a typical model painted from 4 to 6 angles might cost 20 to 50 credits total in 3D AI Studio.
Can I export the painted model with PBR materials?
Yes. 3D AI Studio lets you export your painted model as a GLB with full PBR materials, including roughness, metalness, and normal maps. There is also an optimized GLB option with compression for web and real-time applications.